
In August of this past year 2018, my Darling Son (who was still 5 at the time), was leaning against me on the couch watching Spongebob Squarepants when I asked him what he wanted to be for Halloween.
"Captain Smith," he answered instantly, eyes still glued to the tv.
"Uh, who, honey?" I fumbled, trying to figure out who he meant.
"You know, the captain of the Titanic," he said, snuggling closer. "I can wear a Titanic ship the same way I wore my Gravedigger costume."
Oh.
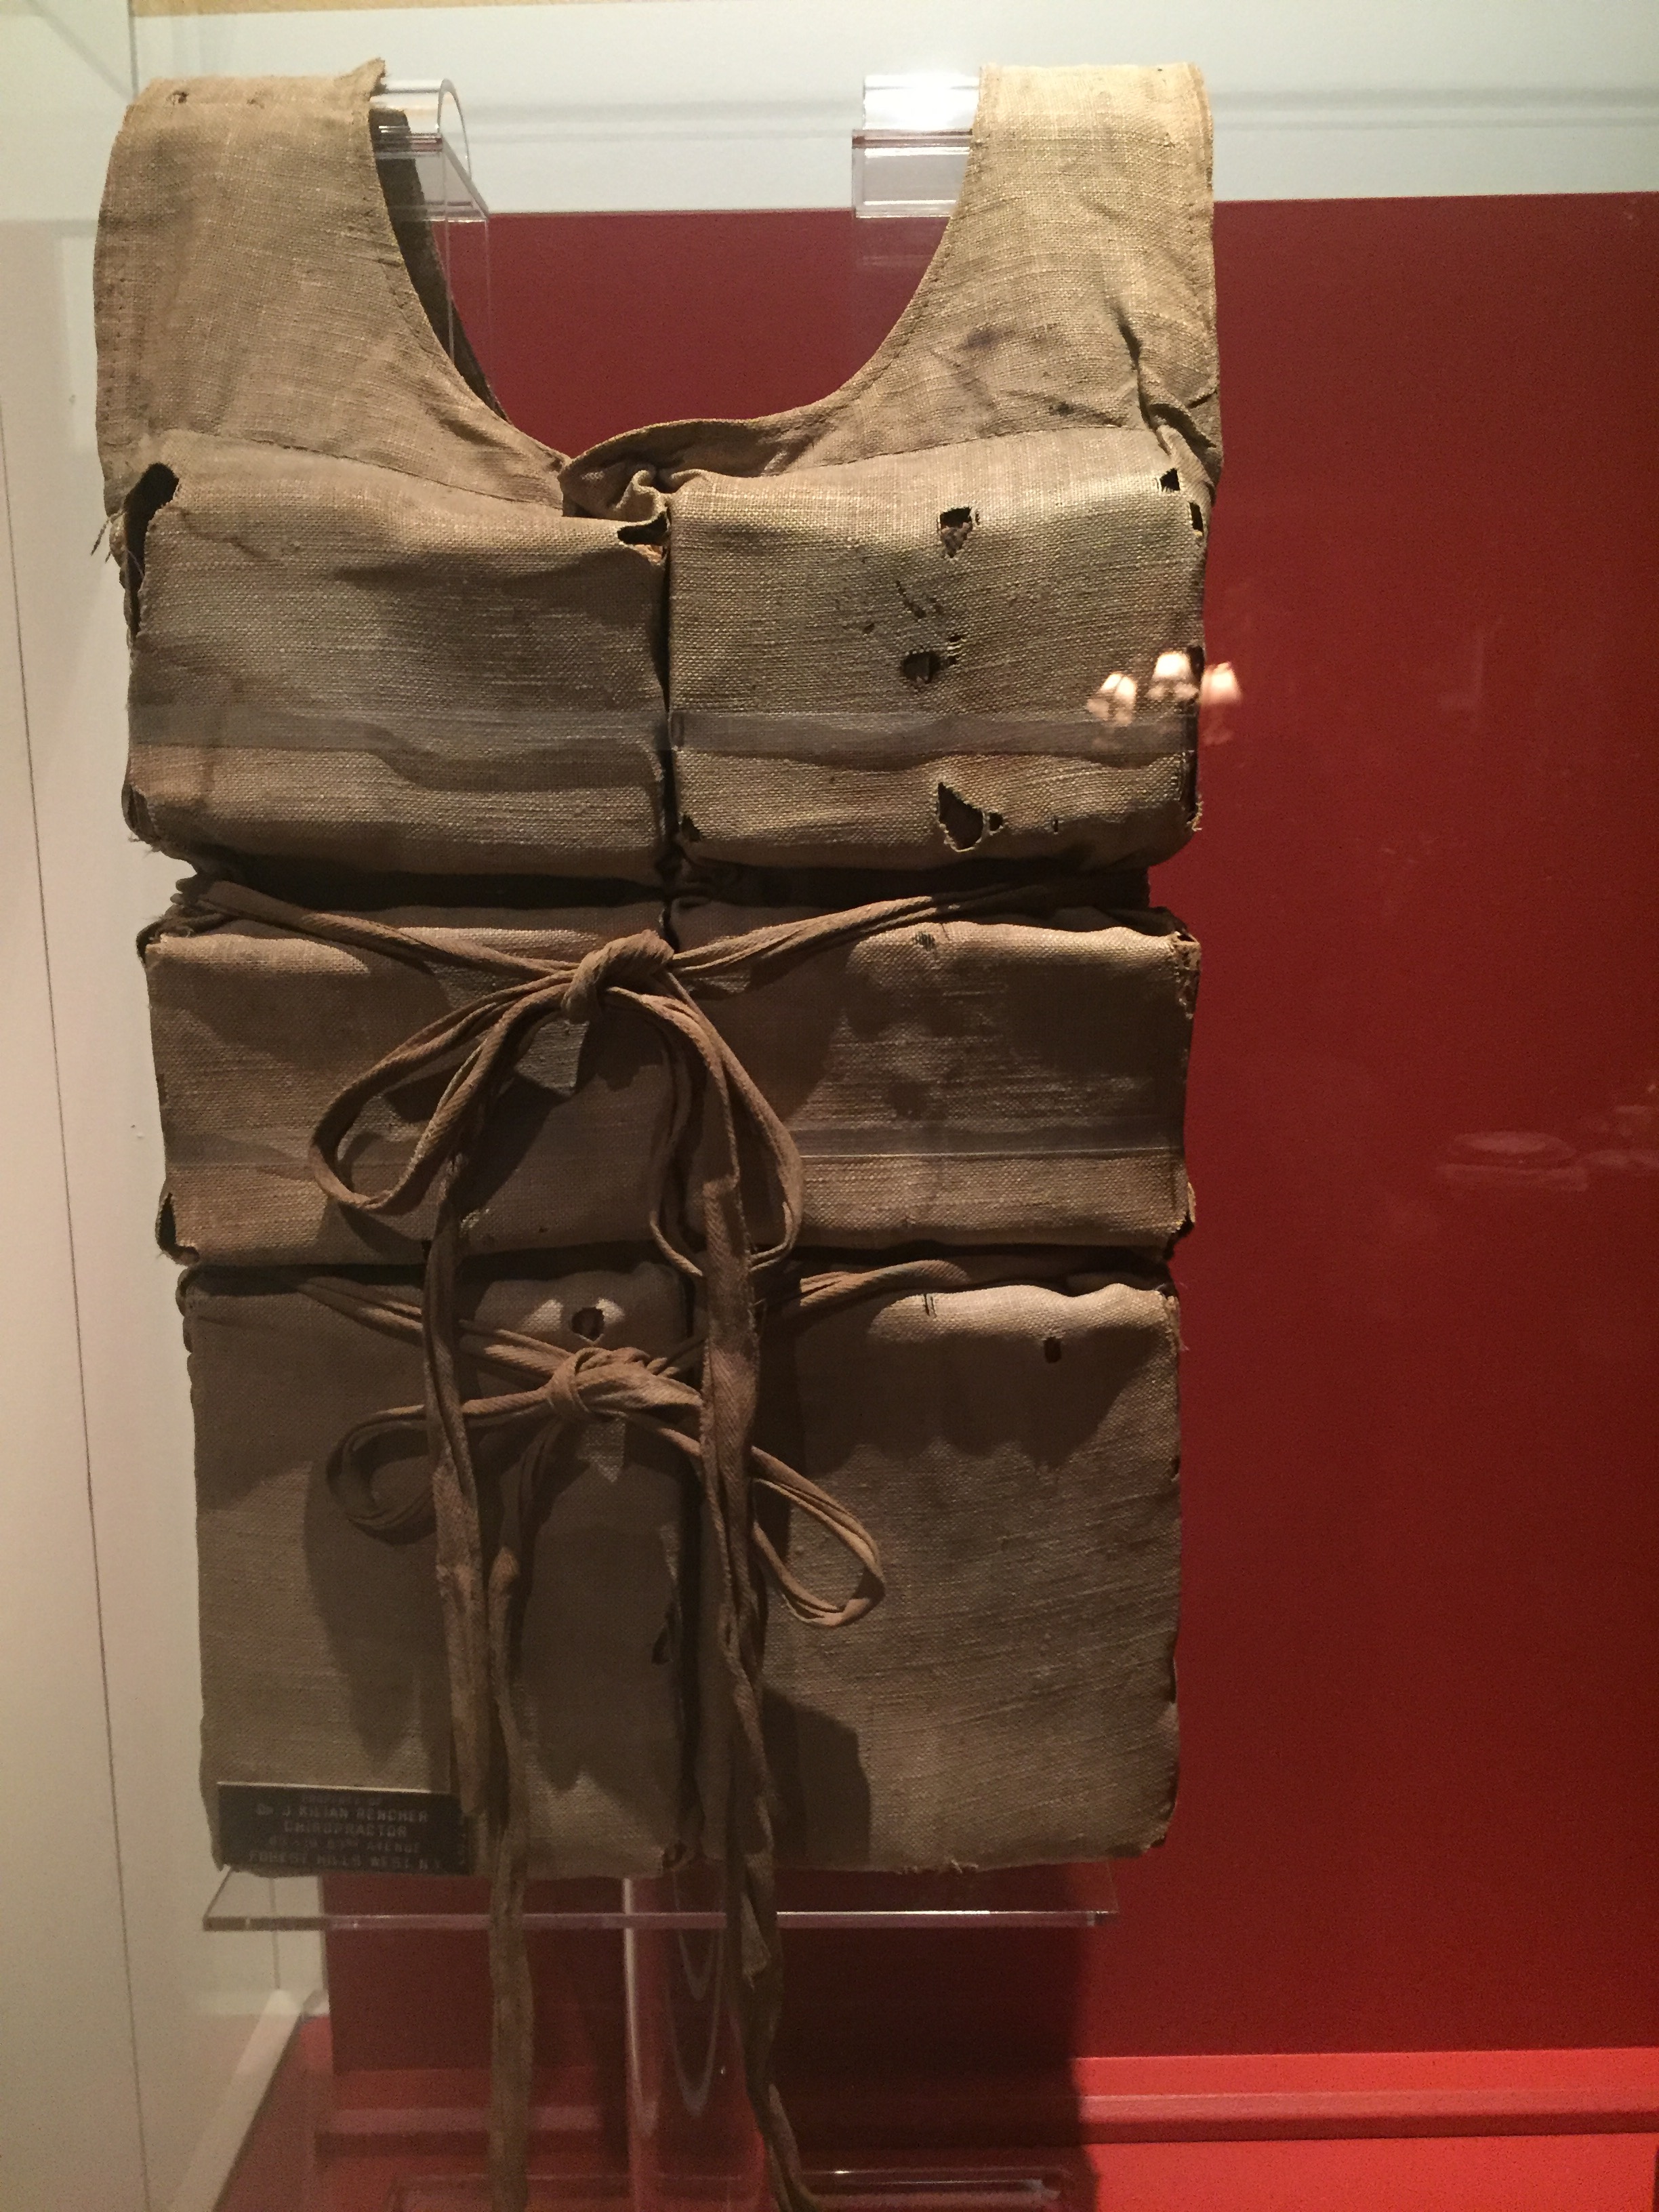
Backing up, I should probably mention two things. First, my son loves the Titanic. He has countless models and toys, wall art, memorabilia, and books. He knows everything about it. We even revolved our vacation this year around seeing the Titanic exhibit at the National Geographic Museum in D.C. where we saw, amongst other things, artifacts like an actual deck chair from the Titanic, Madeleine Astor's life jacket, and John Jacob Astor's pocket watch.
 |
| Someone on the Titanic sat on this! |
 |
| Madeline Astor's life vest |
 |
| John Jacob Astor's pocket watch |
Second, for Halloween two years ago, my son wanted to be a Monster Jam monster truck driver, Gravedigger's driver specifically. I found a Gravedigger driver jumpsuit easily online and, brimming with confidence, told him that I could make a truck for him to wear. After all, I had Pinterest on my side.
How hard could it be?
The answer is I'll never know, because luckily Gravedigger is an incredibly popular truck, and at the 11th hour I found a foam truck that had been commercially produced, and I paid a ridiculous amount for it in my relief. I might have forgotten to mention to DS that I bought it as opposed to making it, but hey, he never specifically asked, amirite?
Fast forward to this past year. "Uh, okay honey. Mommy will do her best," I told DS. Hopeful, I set out to Google. Titanic is incredibly popular too, maybe this costume already exists?
Nope. Nope it does not.
What I did find were several pics of homemade costumes that various industrious parents had handcrafted for their kids. I showed the pics to my husband, who quirked an eyebrow at me but said nothing. This is a man, after all, who has seen me struggle to draw a stick figure.
No matter. Halloween was still far away. I had tons of time. I set about collecting "Titanic-size boxes" at work, and berating anyone who threw a big box in the dumpster before I had a chance to look at it. Over the next few weeks, we had accumulated a sizable collection of large boxes which I stashed in the garage, earning me Another Eyebrow from my husband.
I found my son a passable Navy uniform on Amazon that more or less looked like the pictures, and bought him a little adhesive beard and toy pocket watch. Making progress! Feeling good! I've never assembled or spray painted anything in my life, but so what? Can't be hard. Oodles of time.
September came before I knew it. Boxes were still in the garage. No paint had been bought. Really, no anything for making the ship had been bought. At this point, the Titanic was like Schrodinger's Cat: as long as I didn't start trying to make it, there was no tangible proof that I couldn't.
Suddenly, September was gone. October. Was. Here.
Dang.
I have a very technically demanding job in a STEM field, but I am painfully bad at starting tasks. So I started small. With a list. I hate starting tasks, but I love making lists of tasks. Go figure. So, I listed out the must-have features of the Titanic, and it looked something like this:
- Big black sides
- Red bottom trim
- White stacks of whatever on top with windows
- Funnels
- Anchors
- Propellers
- Then the nice-to-haves:
- Lettering
- Some sort of railing
- Smoke (for the smokestacks)
- Details like windows on lower levels
 |
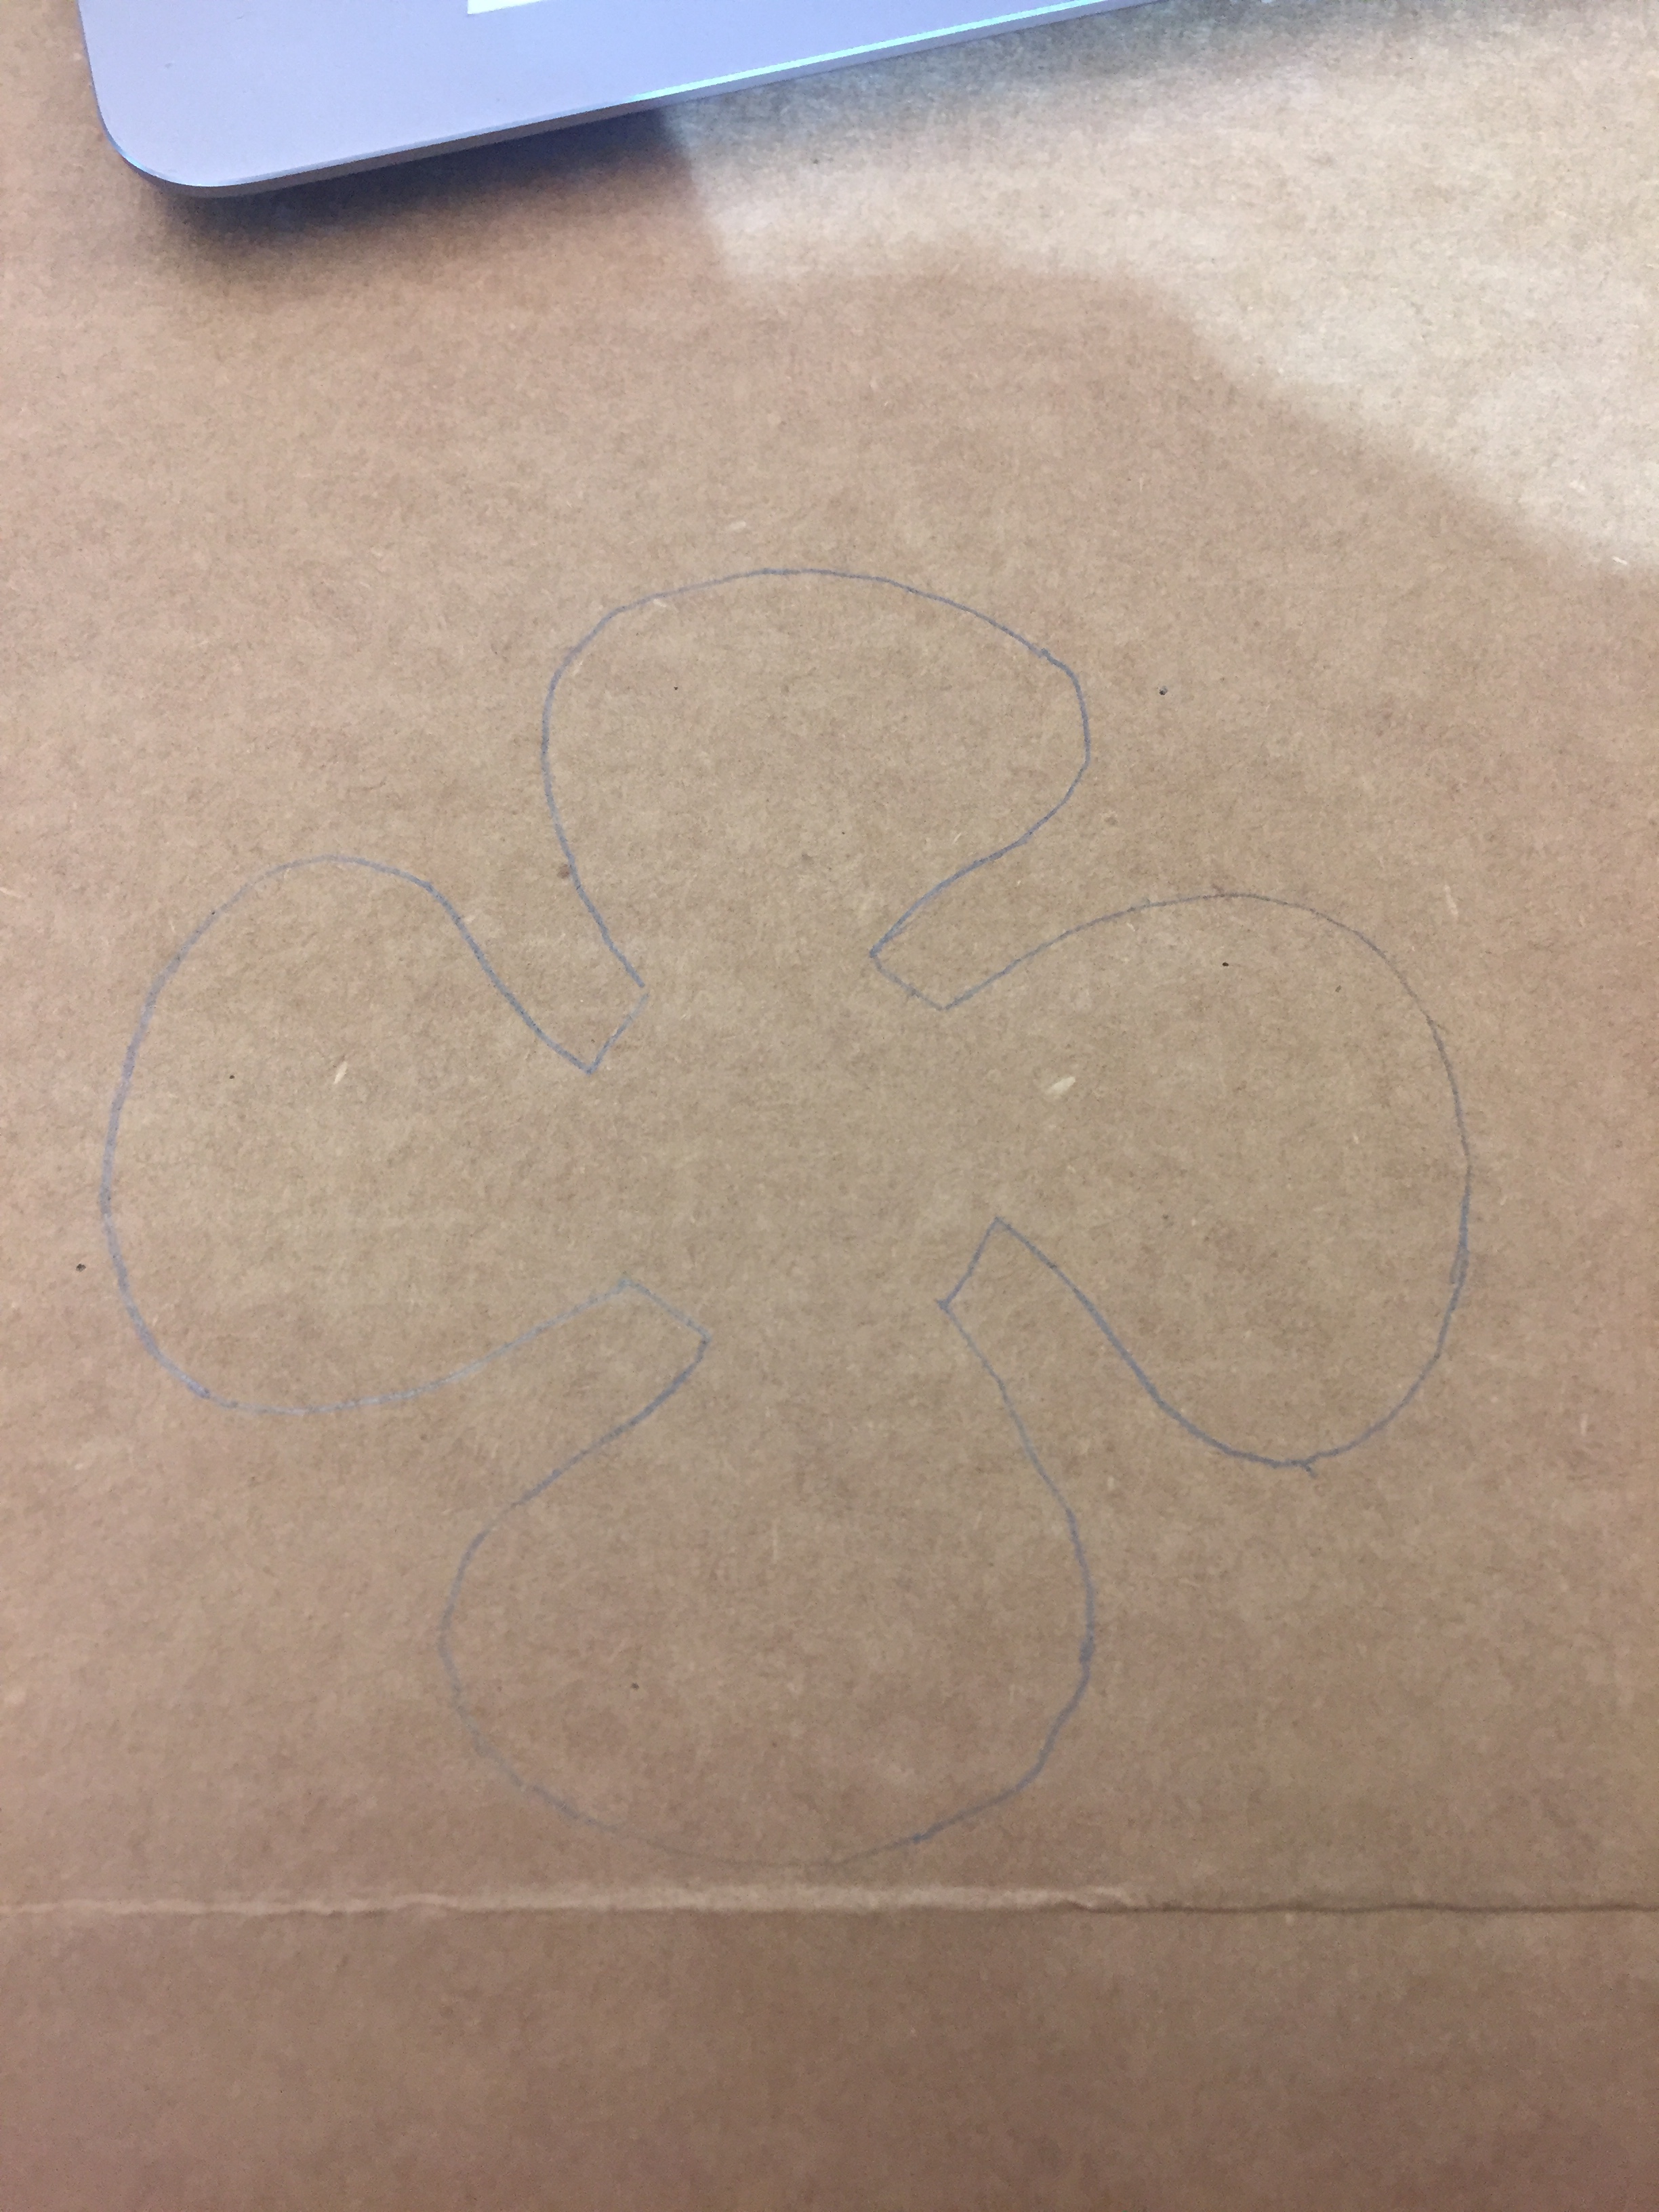
| 3 propellers! Hey, I made something! I rested on these laurels for almost a full week... |
I had to just guess at the size here, because I literally had nothing else built, nor did I have any idea how to build anything!
Then, I went shopping:
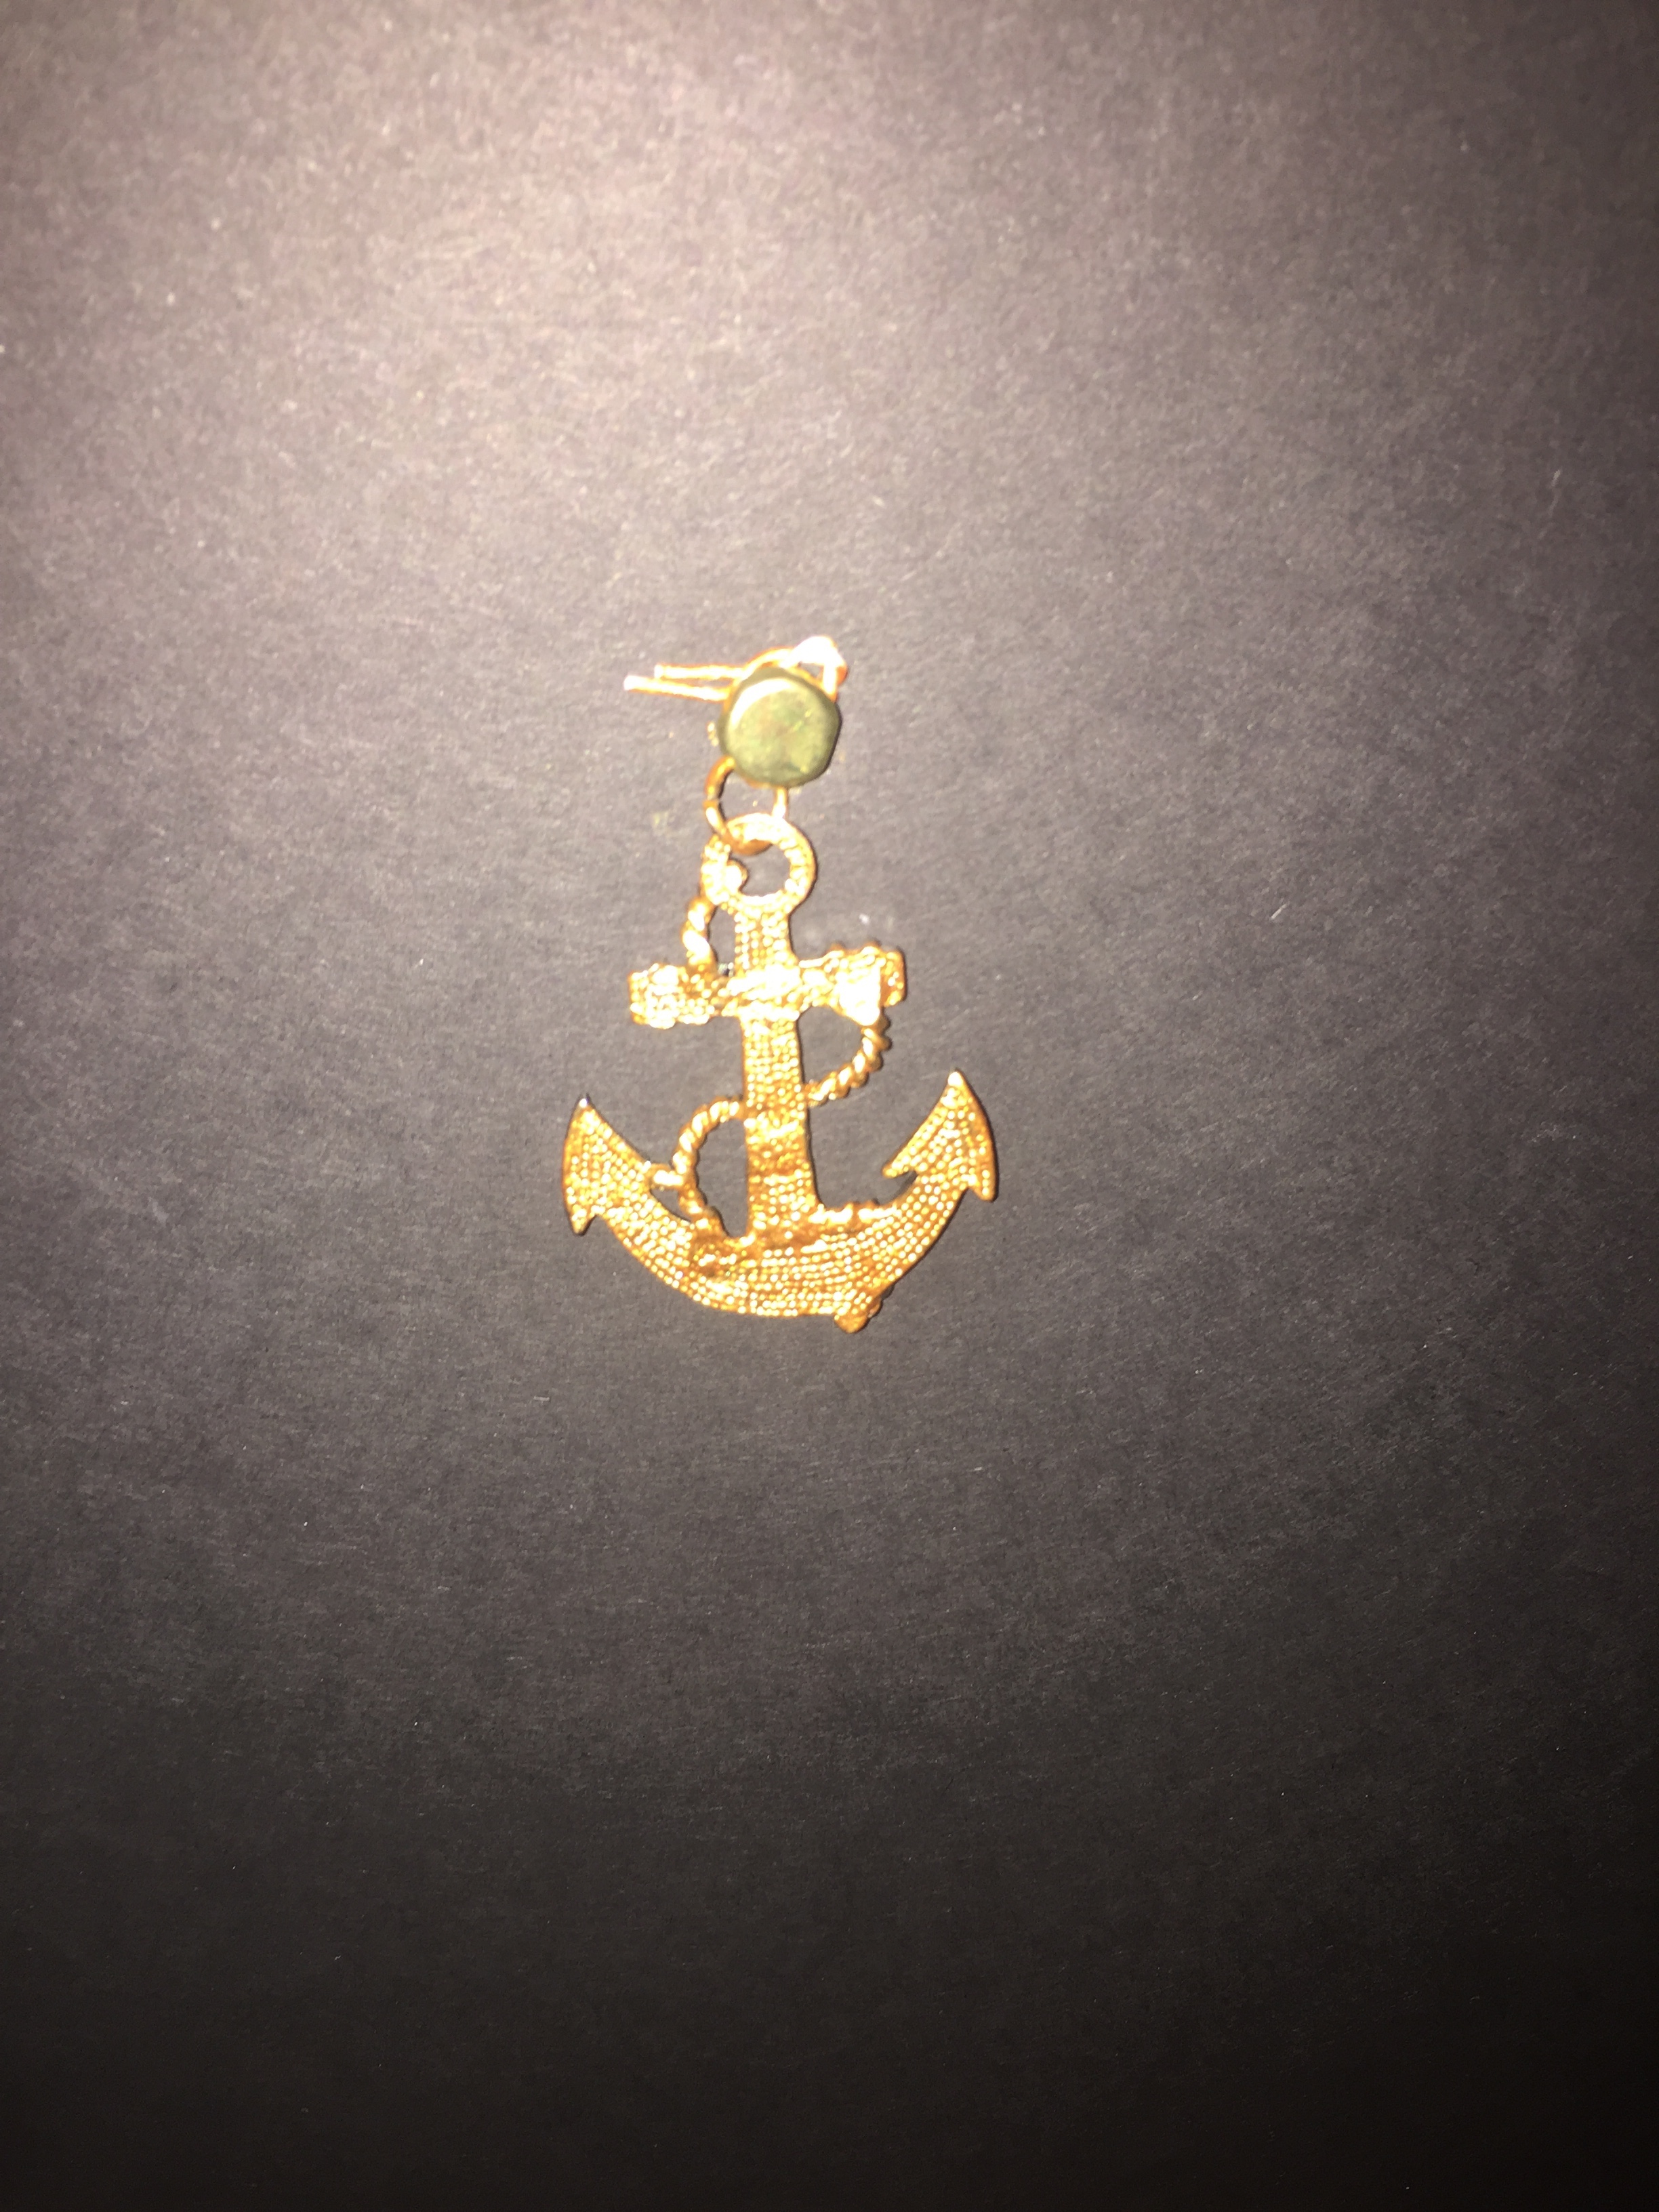
- From Michael's, I bought two miniature metal anchors about 1.5" tall each, and some bronze acrylic paint. I also bought a variety of gold craft adhesive letters.
- From Staples, I bought two white 24" mailing tubes with a 2" diameter for the funnels (I also bought 3" diameter tubes because I wasn't sure which size would be best, but they were way too big).
- I also grabbed 3 FedEx Priority Mail small boxes.
- From Home Depot, I bought this adhesive-backed Velcro tape.
- From Amazon, I bought this White Star crew patch to add to DS' Navy costume, and after reading a blog post about the likely color of Titanic's funnel (a color called "White Star Buff" which apparently had two different hues pre- and post-1920), purchased this spray paint for the funnels along with glossy white. I also bought this dollhouse picket fence because I thought I might be able to make a railing from it.
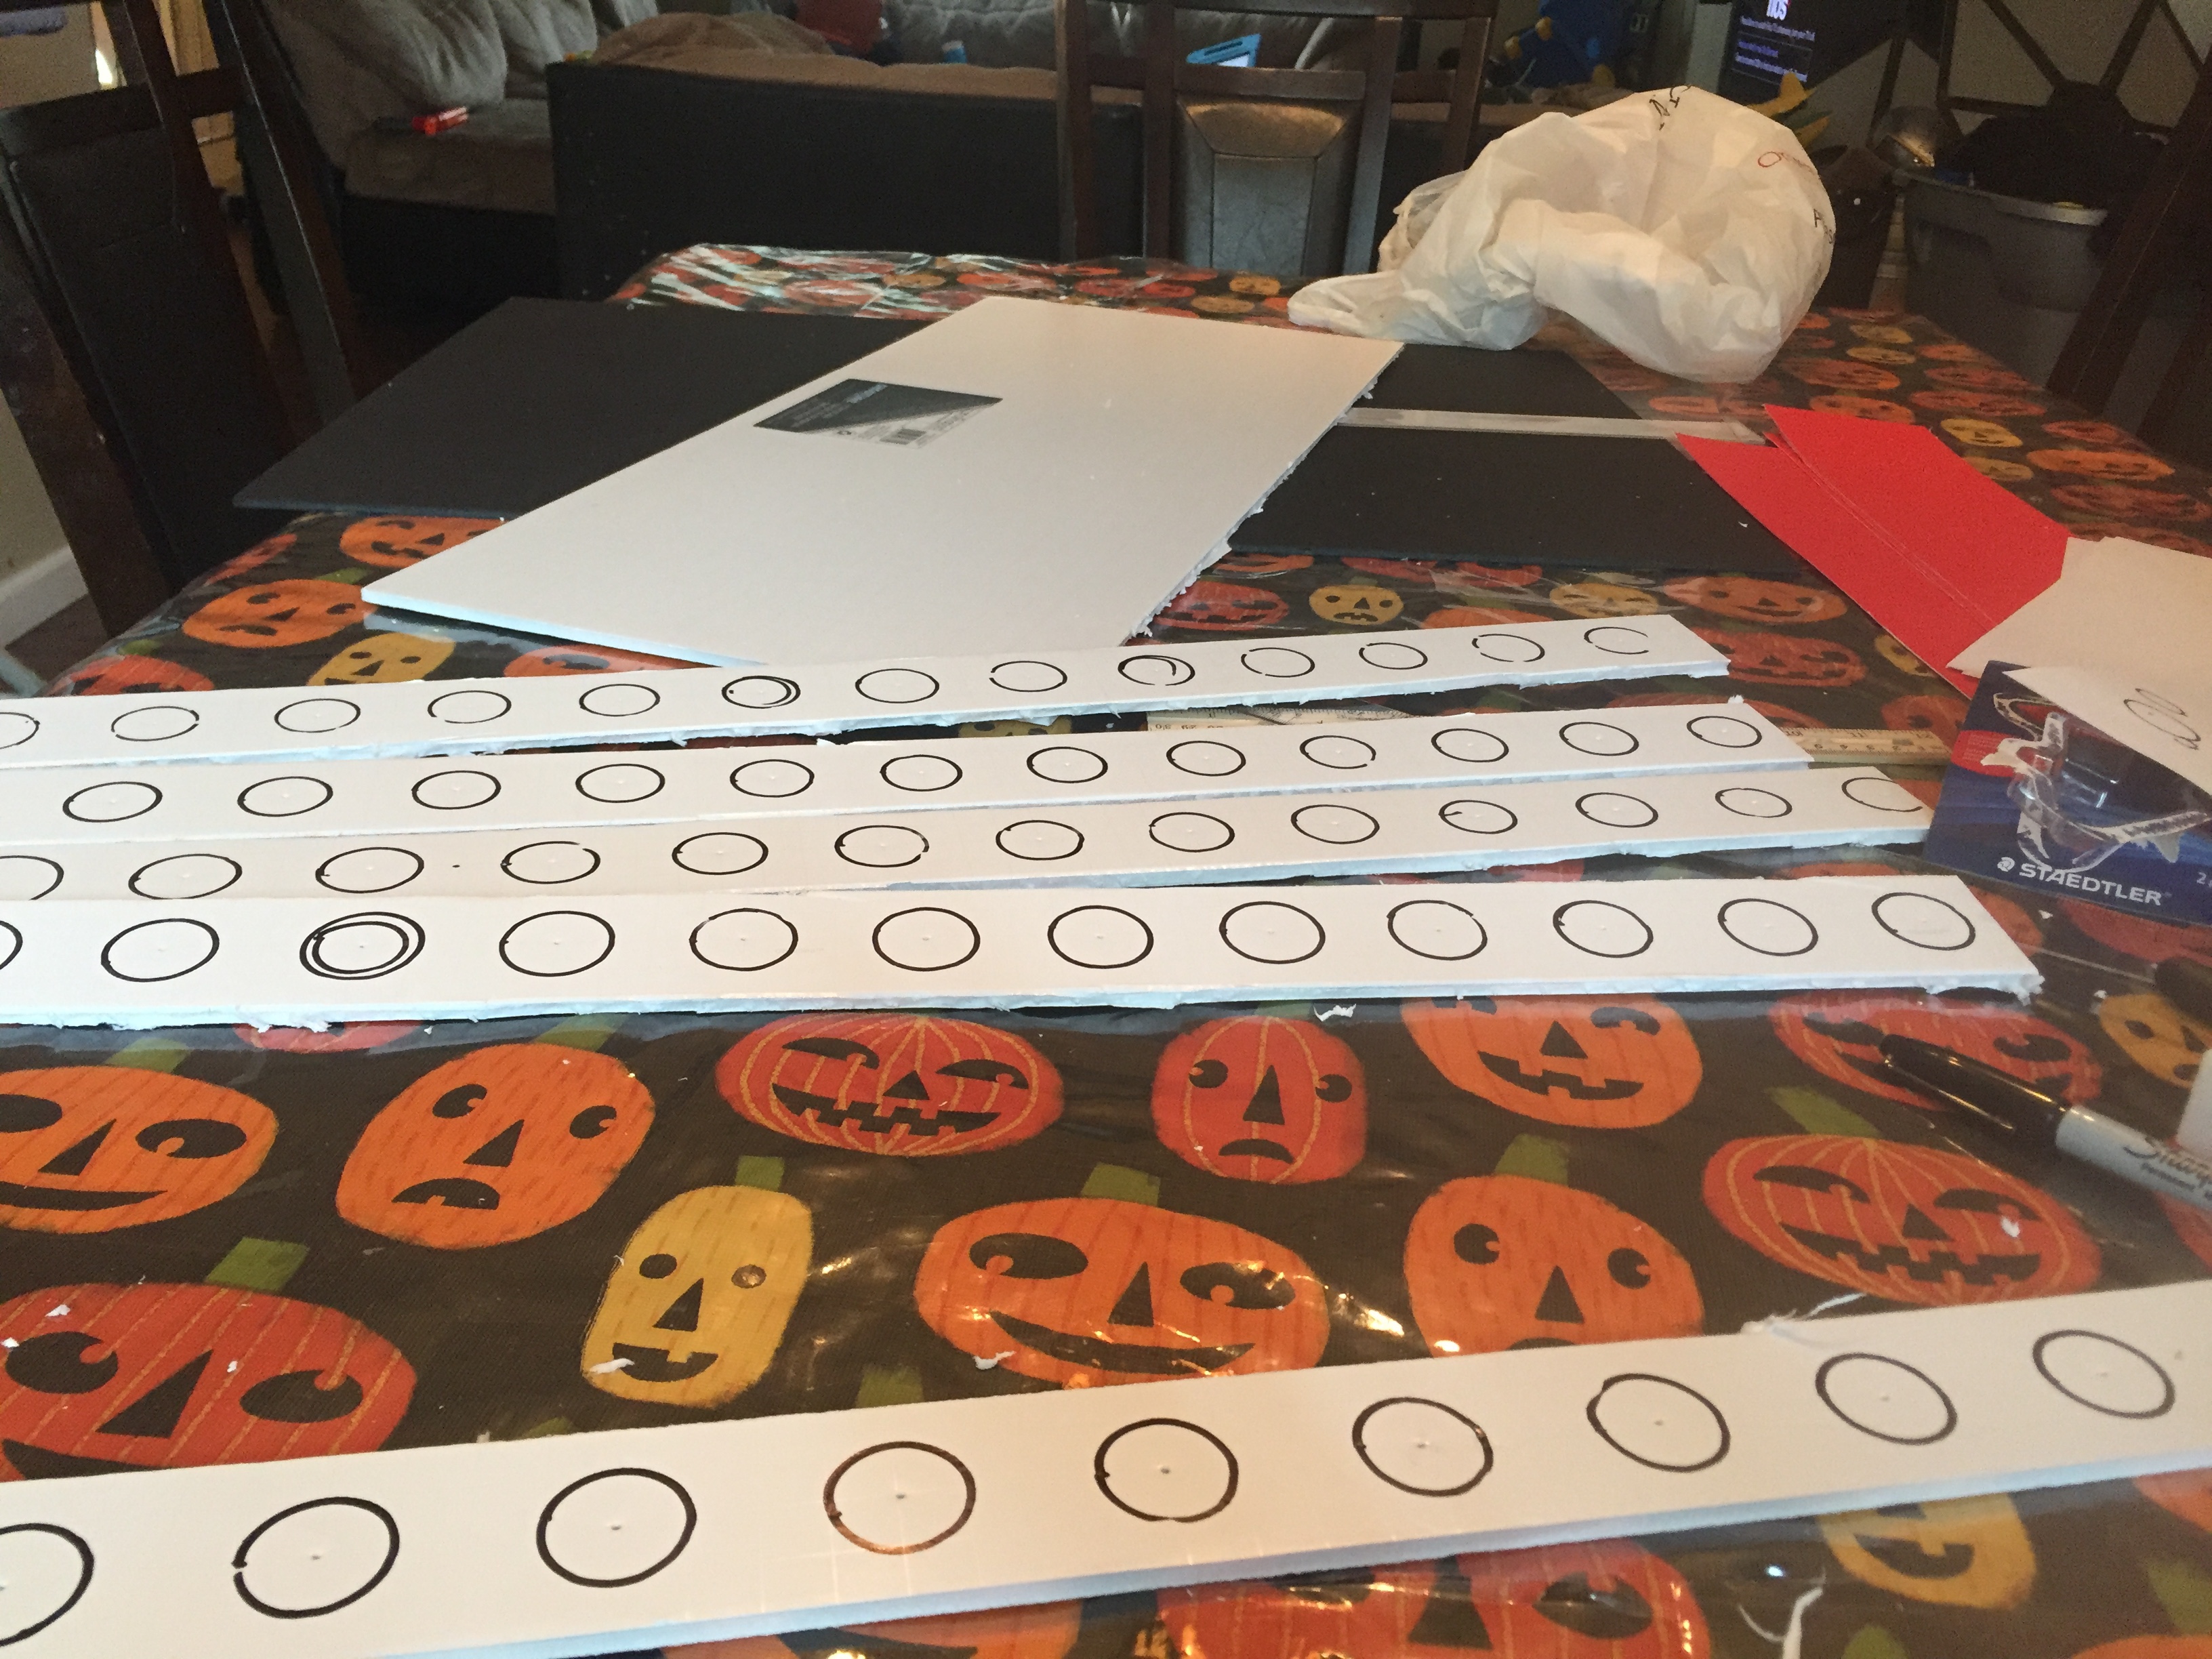
- Walmart was the real jackpot. I went to the store for brads, which I wanted to use to attach the propellers and anchors. While I was there, I spied this 20x30" black foam poster board, and bought 4 pieces. I also bought several sheets of 18x24" white foam poster board, as well as a few sheets of red (not foam) poster board. The white foam board had a faint iridescent grid pattern that came in handy later. I also grabbed a yellow tape. I also got some tools and peripheral items: low-temp glue gun, double-sided Scotch tape, an exacto knife (a ceramic one which I regretted, more on that later), 2 long rulers (one was clear plastic 18"), a geometry compass for drawing circles, and a variety of black Sharpie markers of varying thickness.
The first thing I did was paint the 3 propellers that I had cut from cardboard. I also painted the metal anchor charms. The latter was far more difficult, as the paint I bought wasn't made for metal, but I flipped them over and painted the textured back, which helped the paint adhere better. I'm not sure I saved myself any time using the charms, it probably would have been just as easy making anchors using the same method I used for the propellers.

The main body of the ship was made from the 4 black foam boards. I cut the red poster board into 4 inch strips, and used double sticky tape to adhere them to the bottom of each board. Because the red board was 6" shorter than the black, I also cut 4 additional 4x6" pieces and taped them into these gaps.
I realized that I would need to have some white on the black boards as well, so I decided to cut 2" strips from the white foam boards. This is where I regretted my ceramic exacto knife, because my cutting edges were sloppy. Luckily this was less obvious on the finished ship. And as with the red, because these white boards were only 24" long, I had to cut 4 additional pieces, this time 2x6". For the white strips, I used the compass with a fine tip Sharpie in it to trace 1" circles to look like circular porthole windows. The centers of the circles (where I placed the needle) were 2" apart from each other.
 |
| Future portholes |
I chose the piece I wanted for the stern, and used a brad to attach the center propeller to the fold's seam. I flanked this propeller with the smaller ones on either side.

On the bow piece, I used the gold adhesive letters to spell Titanic on either side (later I re-enforced this with cellophane tape to prevent peeling). I punched through the black board on either side with the anchors. Then, I took the mini picket fence and carefully pushed it into the top of the black foam up to the bottom wire. This made holes in the foam which meant that I could easily remove the fence and put it back again as I built various other pieces.
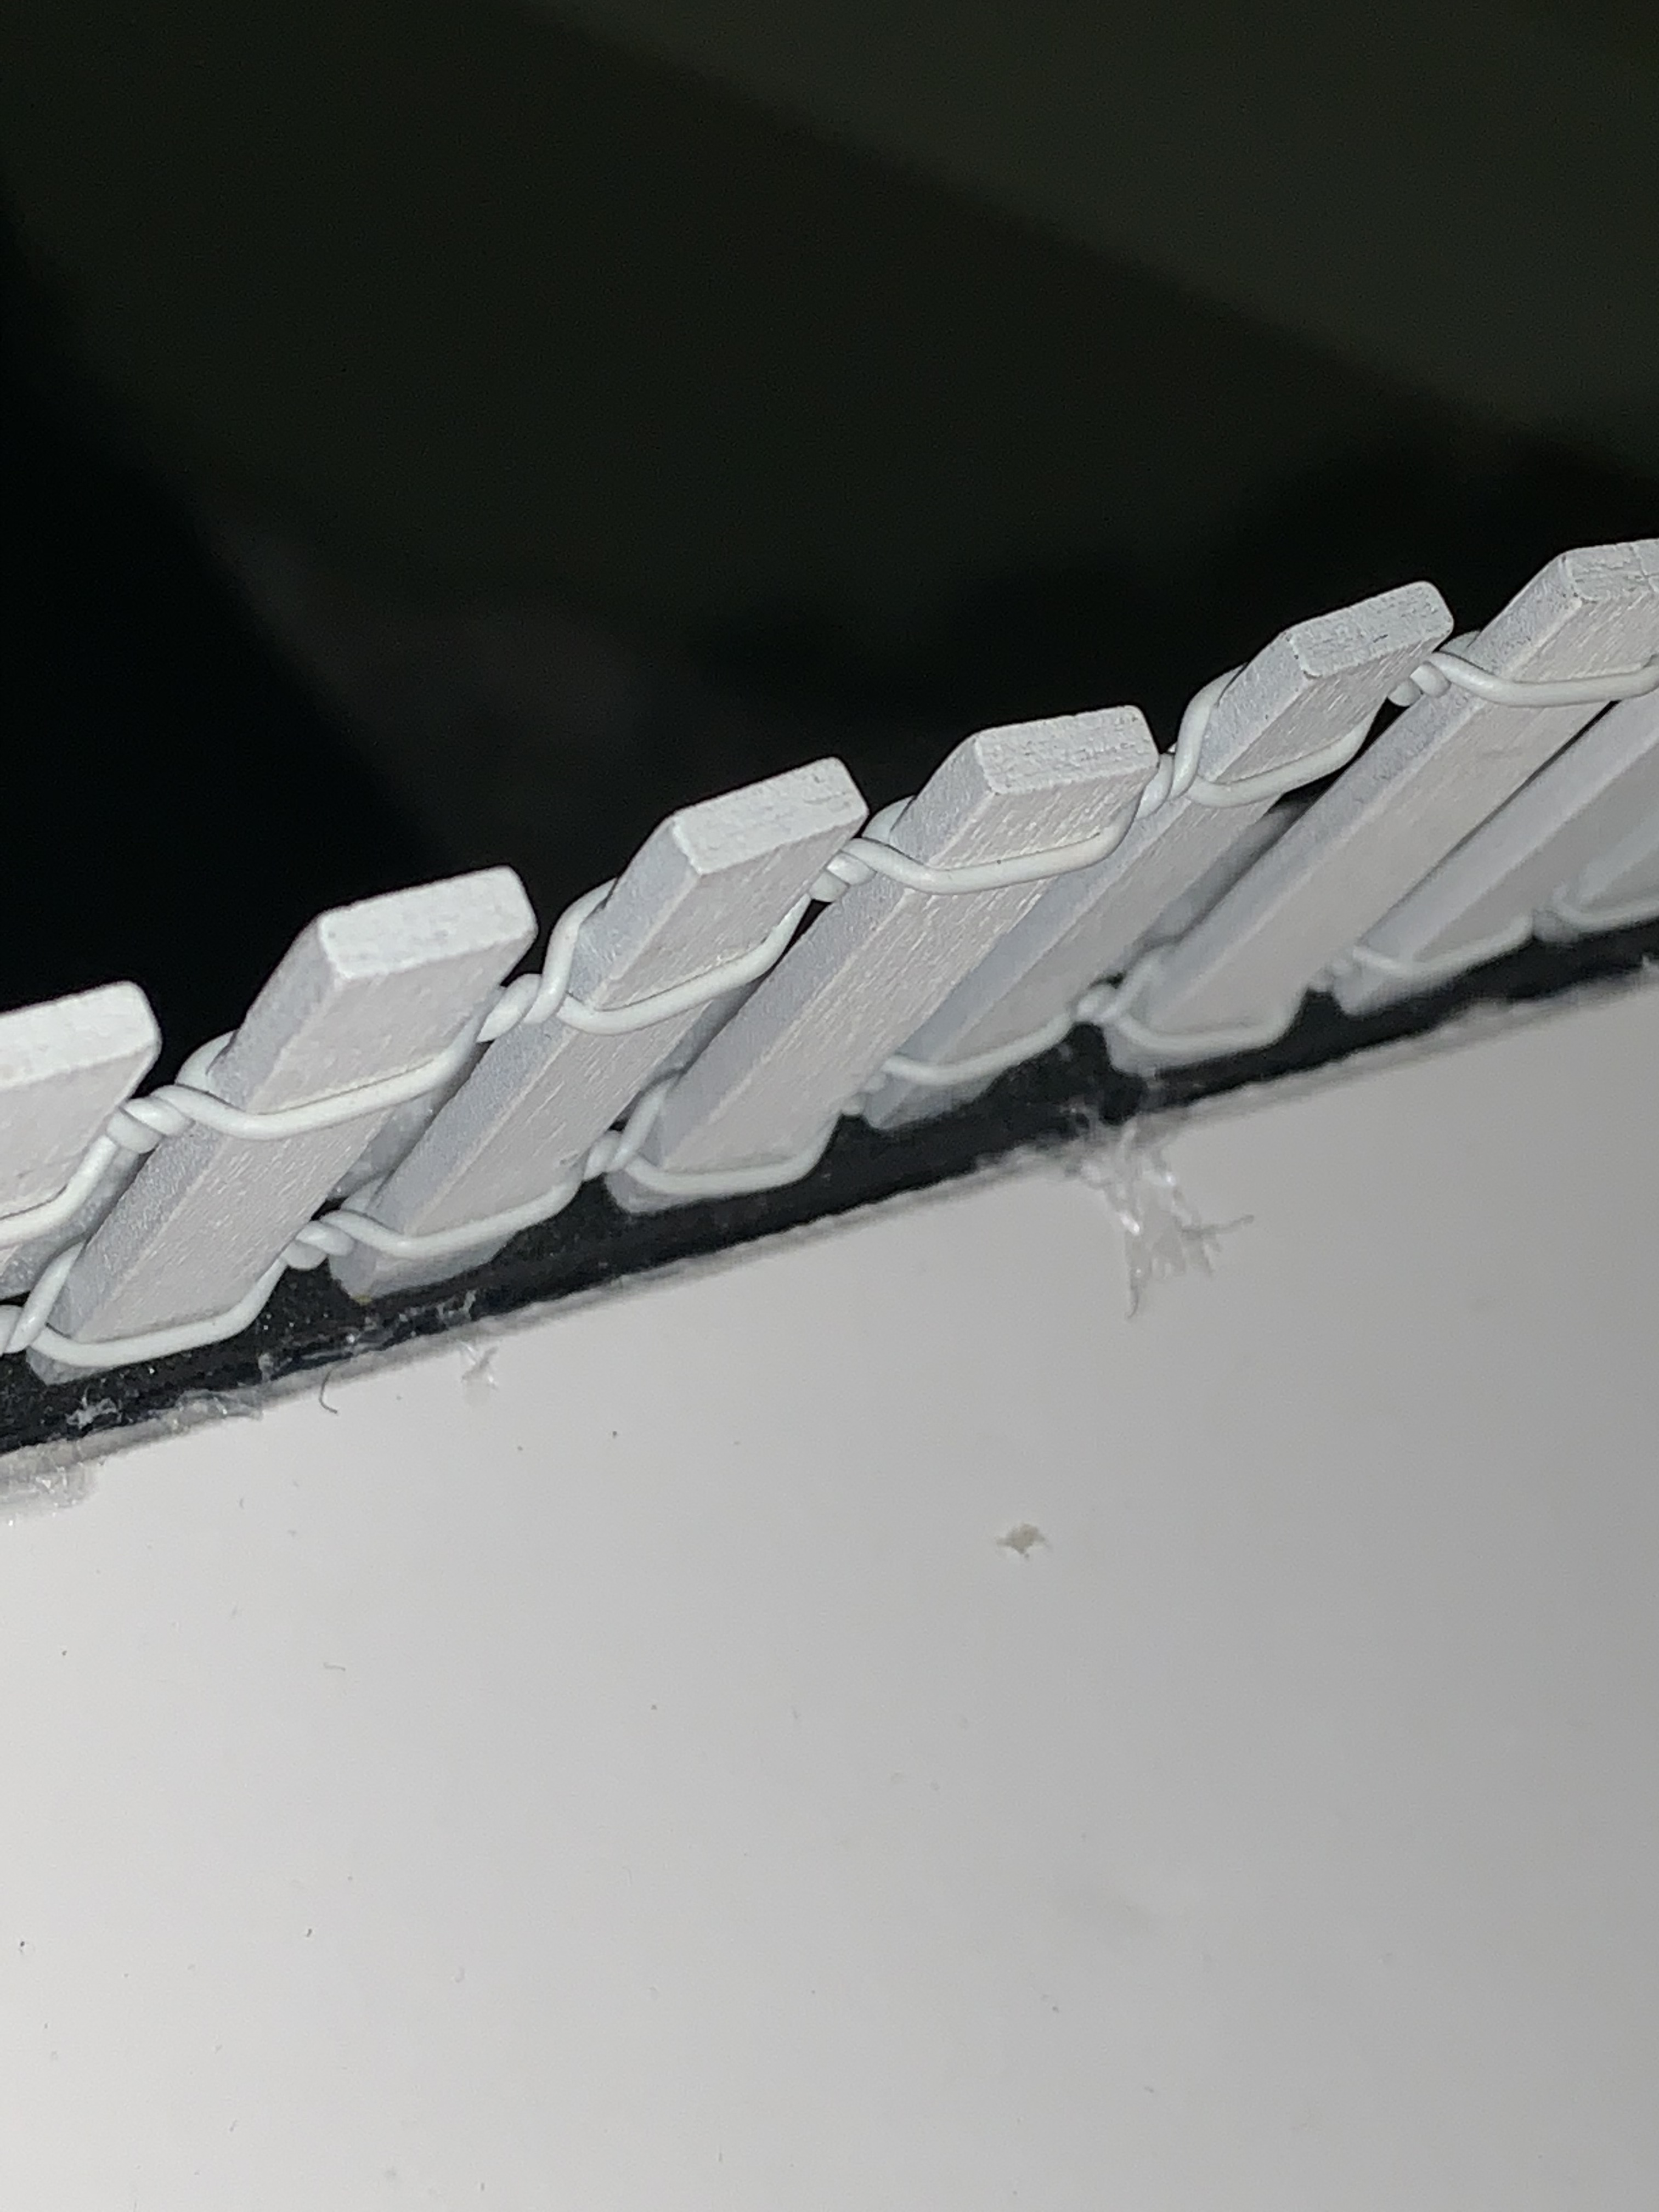 |
| The fence pushed into the black foam |

Next, I start figuring out how to make the interior of the ship. First, I cut each mailing tube in half (12" long after the cut), intending to have the side with the cap be the top of each funnel. I spray painted the funnels with the yellow paint. Sure, I painted the grass yellow too, but I got it done. I let those dry for a few days while I tackled the upper decks. My vision in my head was to build a structure at the bow and stern that suggested the deck and the upper part of the ship, while leaving the center open for my son to stand in.
As a support structure, I took the 3 still-flat FedEx boxes, and spray painted one white. After it was dry, I cut all three down the center crosswise in half -- since each box is 12.25"x11", each half was ~6"x11". For the two halves that were painted white, I used the compass to trace two 2" diameter circles per half, which I cut out of the top part of the box only, with my exacto knife. These holes were for the funnels, so they could be secured via the cutout of the first box, and stabilized with the other two boxes underneath. I then assembled the 6 halves into two stacks 3 halves high each, alternating the cut and sealed ends, with each spray painted half as the top of each stack. The stacks were held together with the tape.

I then cut 4 pieces of white board to cover the front and sides of each stack (so 8 pieces total). The front and back faces of the boxes were 11"x5" so I cut 4 of those pieces. I cut the sides of the stacks to extend little longer than the 6" length of the boxes, at 9"x5".
For the front and two side pieces per stack, I used the Sharpie and a ruler to draw windows and shadows to approximate what I was seeing in pictures of the Titanic. When I did this, I laid the 3 pieces per stack in a row with the front piece in the center, because I wanted to create the illusion that the windows and awnings were wrapping around from the front to either side. I used glue to put the front and sides on each stack once they were dry. The markings didn't line up perfectly, but they were close enough.
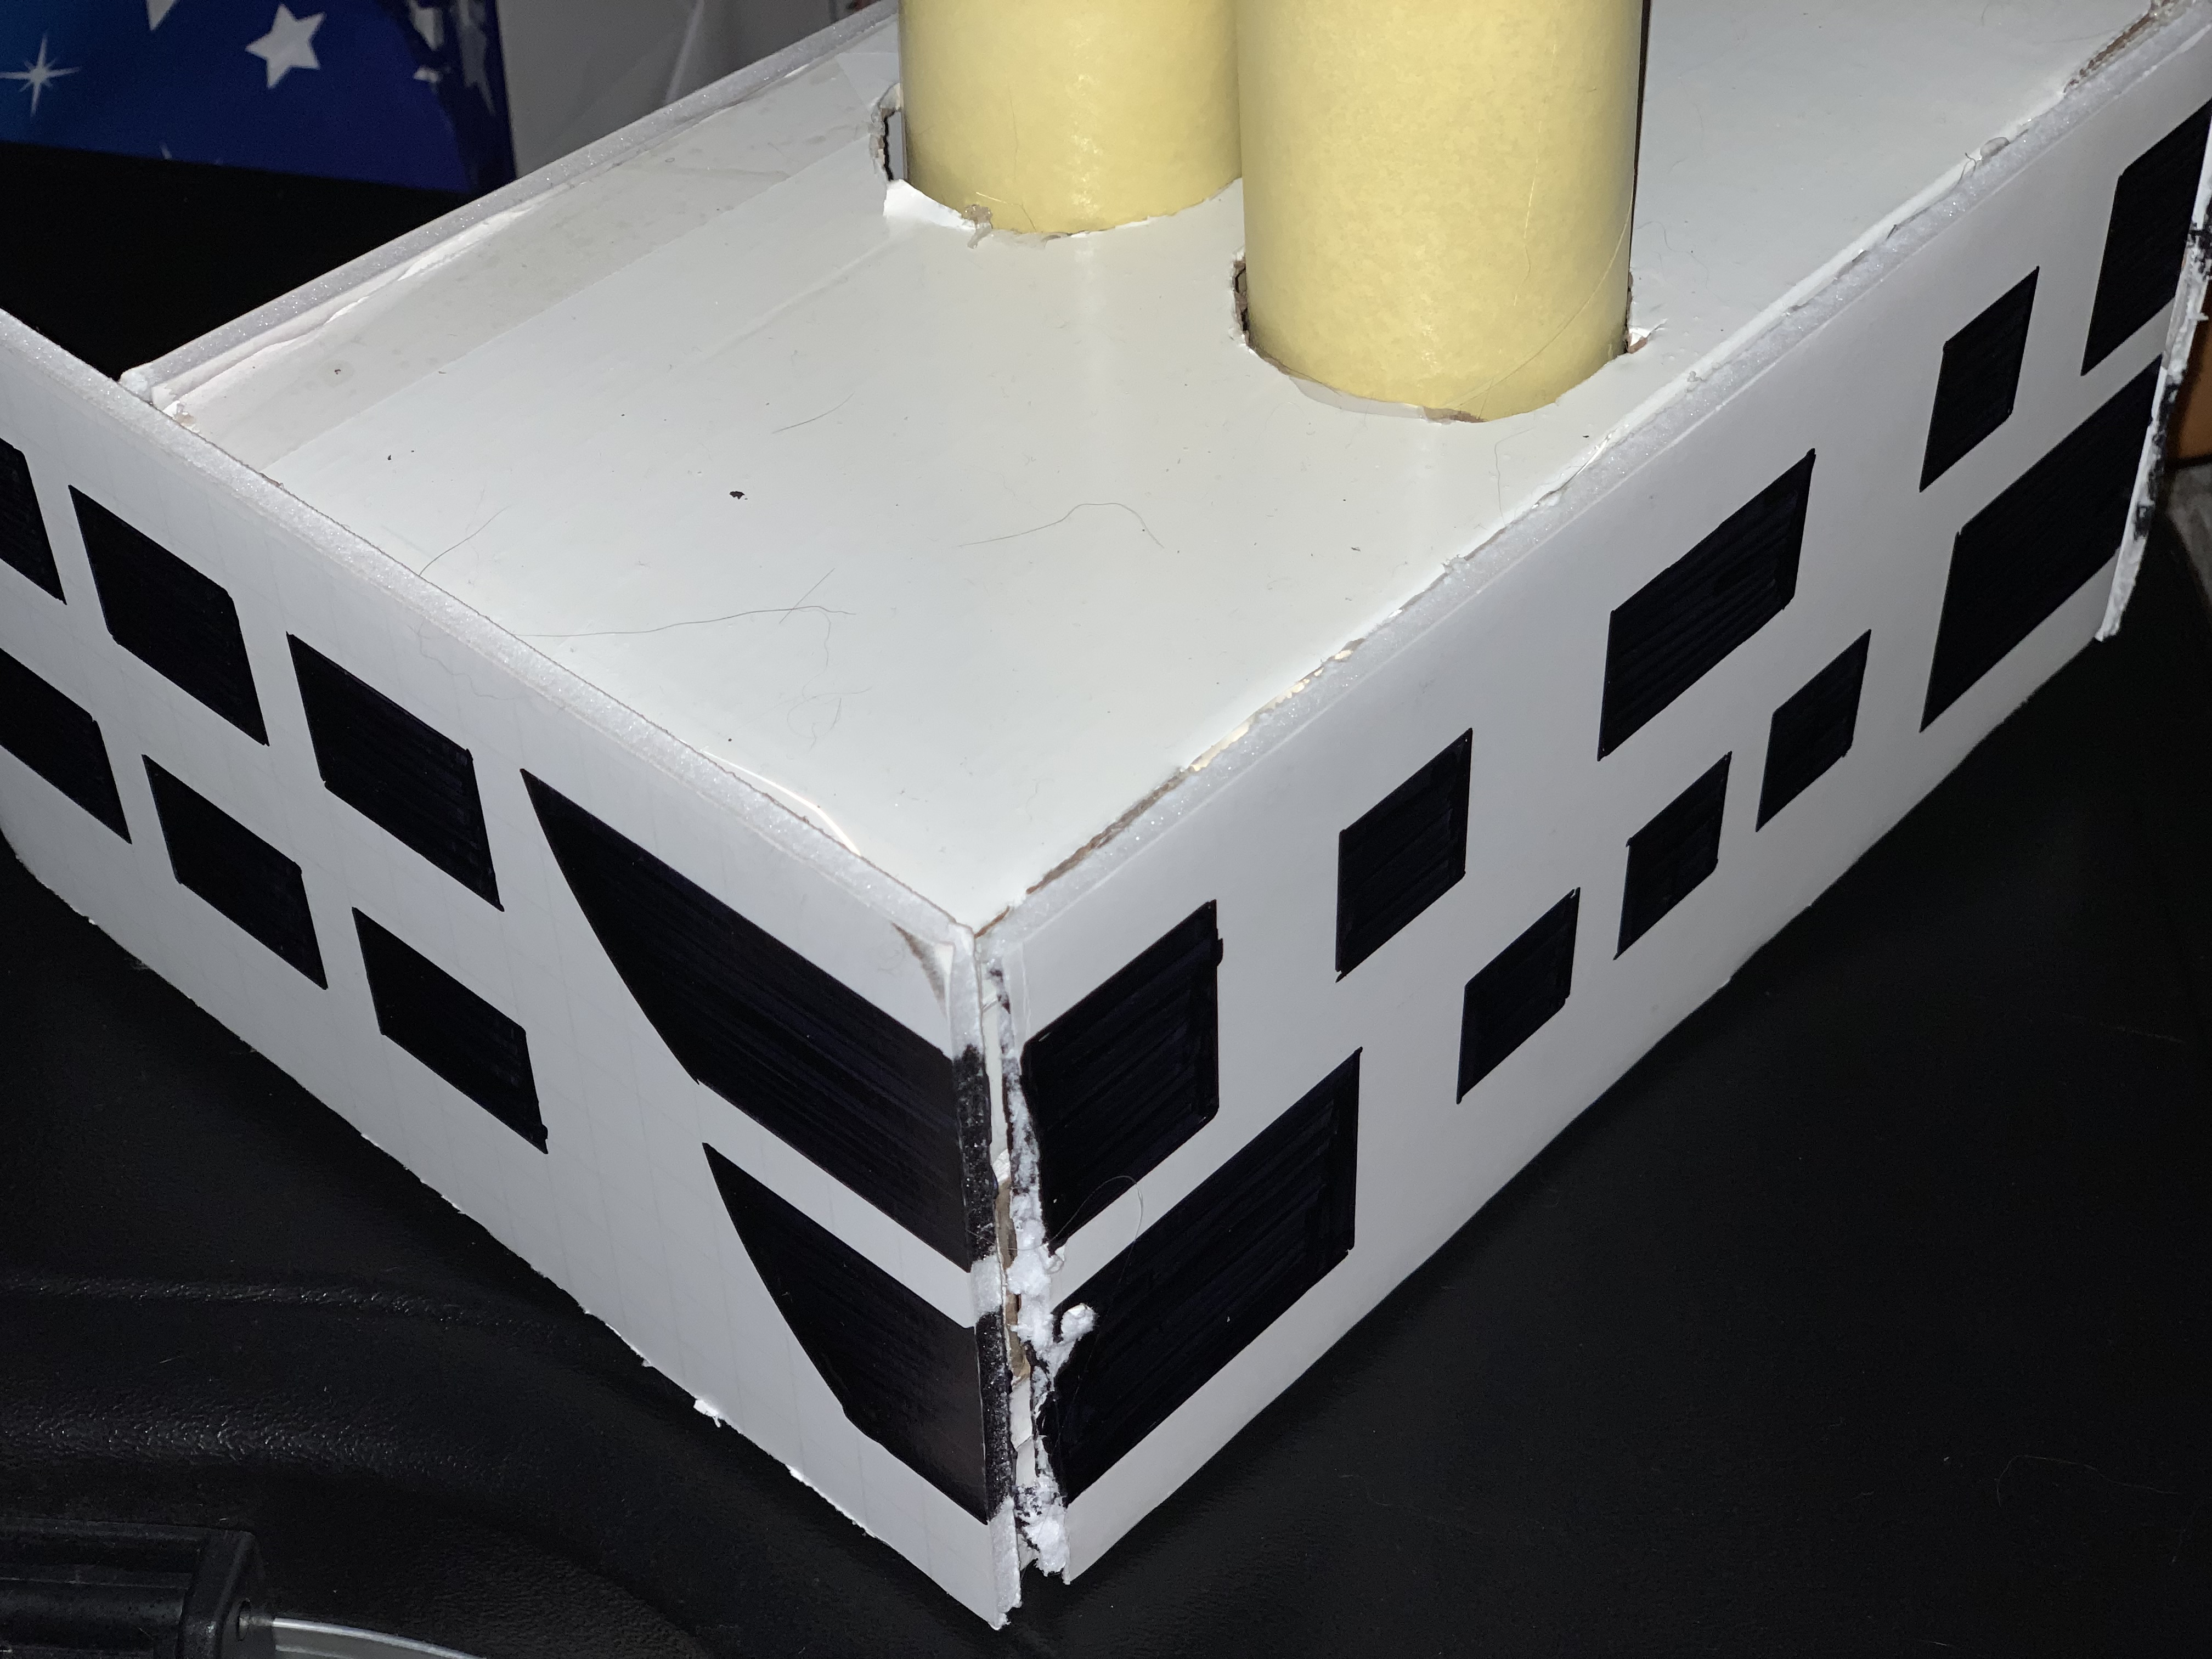
Once the funnels were dry, I used the Sharpie to color each one black for 2 inches from the top. If I had more time, paint would have looked better, but I was loathe to buy anything else or take any more time. Once those were dry, I put glue around the rim of each and fitted them down into the holes of each stack, 2 per. I glued cotton balls into the two funnels of the bow stack, and the first funnel of the stern stack (because only 3 of the Titanic's funnels were functional, the 4th was there to make the ship look more symmetrical).
I then attached a back piece to each stack to cover the cut boxes from view. I attached each of these with a piece of mailing tape across the top so that the flap could open like a hinge (more on that in a minute).
The day before Halloween, I stumbled upon an illustrated cutaway of the ship's interior online that seemed made for the dimensions of the costume. Even though no one would see it but my son, I added it to the interior face of each stack as a last-minute detail. So, I ended up with 2 stacks like this:
 |
| The two stacks |
 |
| Looking down from the top, you can see where the poster board has been glued on the sides |
 |
| This is the illustrated cutaway of Titanic's interior with the Grand Staircase running down the center -- DS loves this detail! |
 |
| The hinged back |
 |
| The "deck" platform. It is only glued to the bow up to the seam with the side of the boat |
 |
| The stack Velcro taped to the deck |
Around this time, I started to realize that my life would be a lot easier if I could make the stacks detachable. In fact, the more parts that could reversible be taken off, the better.
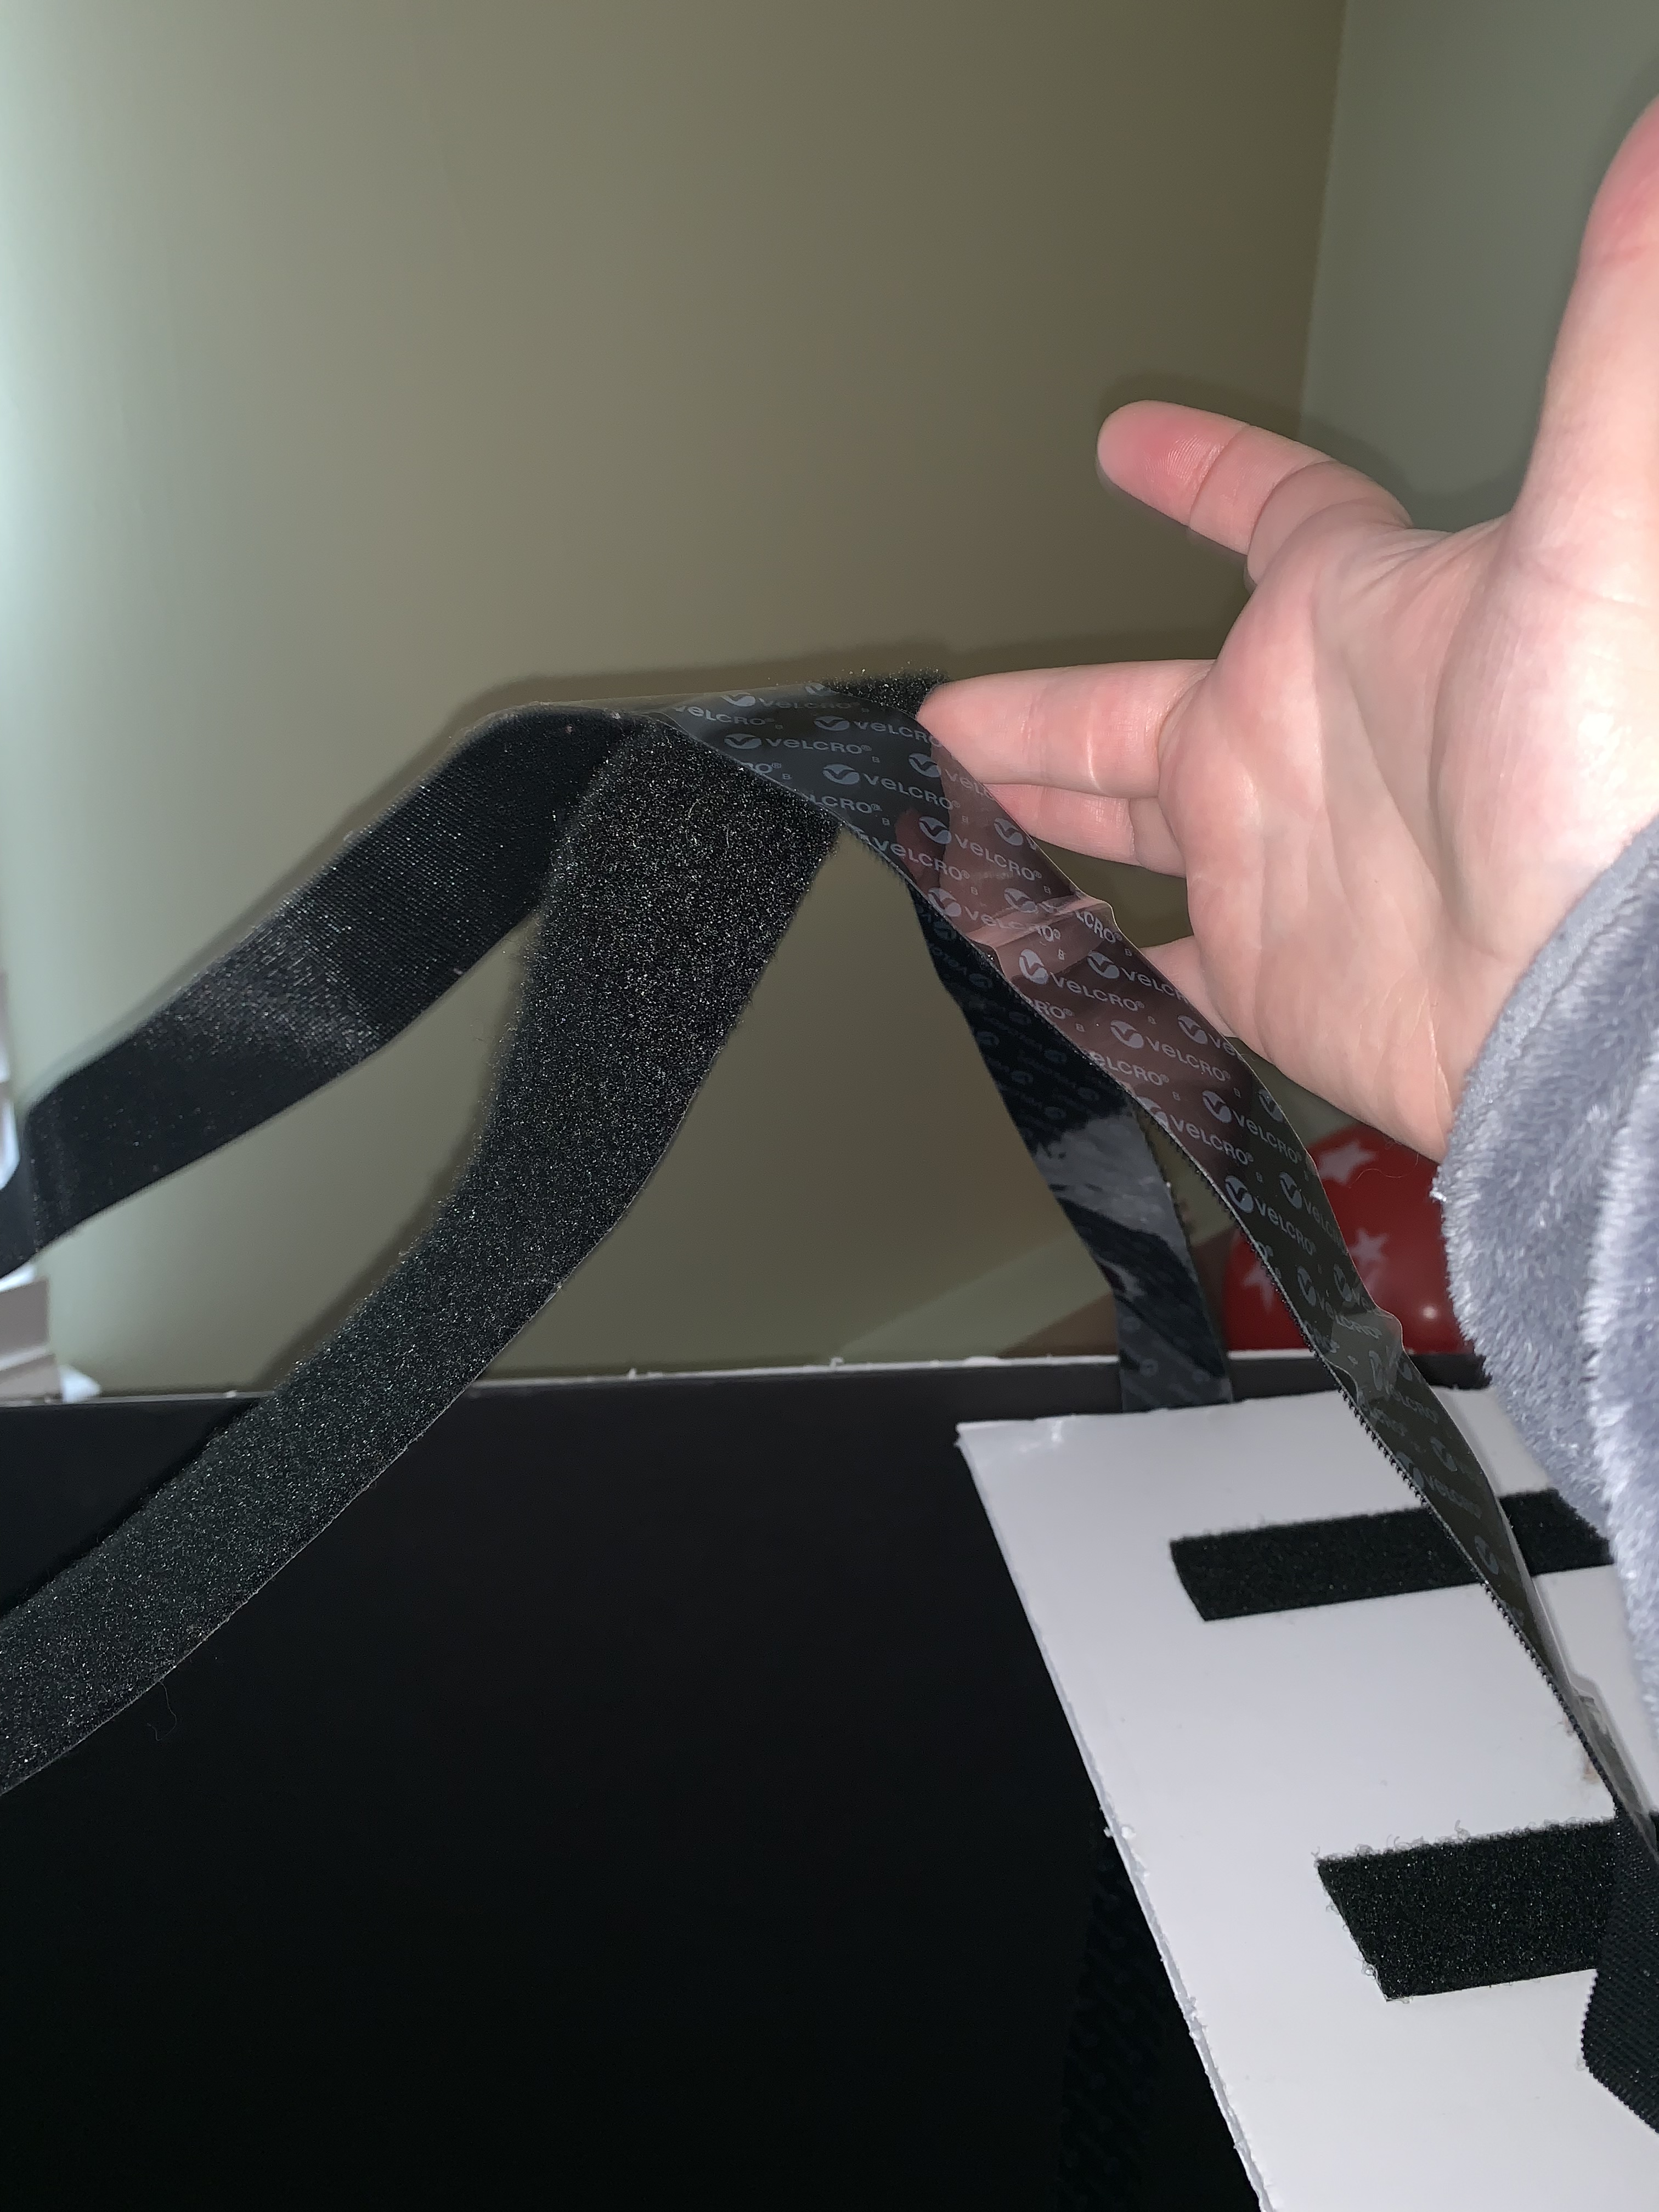
Enter the Velcro tape.
I used the tape to adhere the stacks to the decks, which is why the hinged back of the stack came in handy - I could flip it up and it gave me a way to grip the stack to get it off the deck without accidentally yanking the white board off of the sides.
Instead of permanently glueing all of the black boards together, I decided to use the Velcro tape again.
The tape came as 1.5" wide, the hook and loop sides already pressed together, with adhesive backing on each. I cut 4 long strips, each almost 20" long to cover the majority of each seam between the black boards. Then, for each seam, I peeled the hook and loop pieces apart, and sliced the hook piece (the hard side of the Velcro) in half lengthwise, to get two 3/4" hook pieces. I took the adhesive off of the hook pieces, and applied them to either side of the seam between the black boards. Then, I was able to take the loop strip (still 1.5" across) and span both sides of the seam, binding them together in a reversible way. I left the back paper on the loop strip so that it wouldn't be sticky.
 |
| The cut hook pieces are adhered to, and flank the seam between the boards. The top loop part can span both sides and hold the boards together |
 |
| The loop side, fully down, holding the ship together |
I decided to employ a similar method for the shoulder straps to hold the ship up on my son. This time, there was no slicing of the tape, I left the whole thing as 1.5" across. I had my son stand in the boat to approximate the length. Then, I cut 1 long strip, in excess. I decided that one strap would be hook, and one would be loop, so that they would latch when crossed over behind my son's shoulders. I separated the two sides but kept the paper backing on the adhesive for both.
 |
| One strap is hook, the other is loop |
 |
| Strap adhered inside the ship. You can also see one of the seams right next to it |
One final touch, I downloaded clip art of 3 flags: US, UK, and the White Star flag. I printed each out as mirror images duplicated horizontally so that I could fold them over a wooden dowel (1/4") with double-sided tape. The Titanic was oriented with the US flag at the bow (where the ship was headed), the UK flag at the stern (where the ship was coming from), and the White Star flag somewhere in the middle. I should have adhered then with glue, because I just forced the dowels in, but I was already pretty tired by this point. I wish I had secured them better however, since they kept slipping throughout the day.
 |
| US flag on the bow |
 |
| UK flag and additional lettering on the stern |
And then, I hot glued that White Star patch on my son's costume uniform and, because I can't quit, I also downloaded the emblem from Captain Smith's hat, printed it out, backed it onto foam board, and glued it to my son's hat.
 |
| You can see the hat and uniform patch |
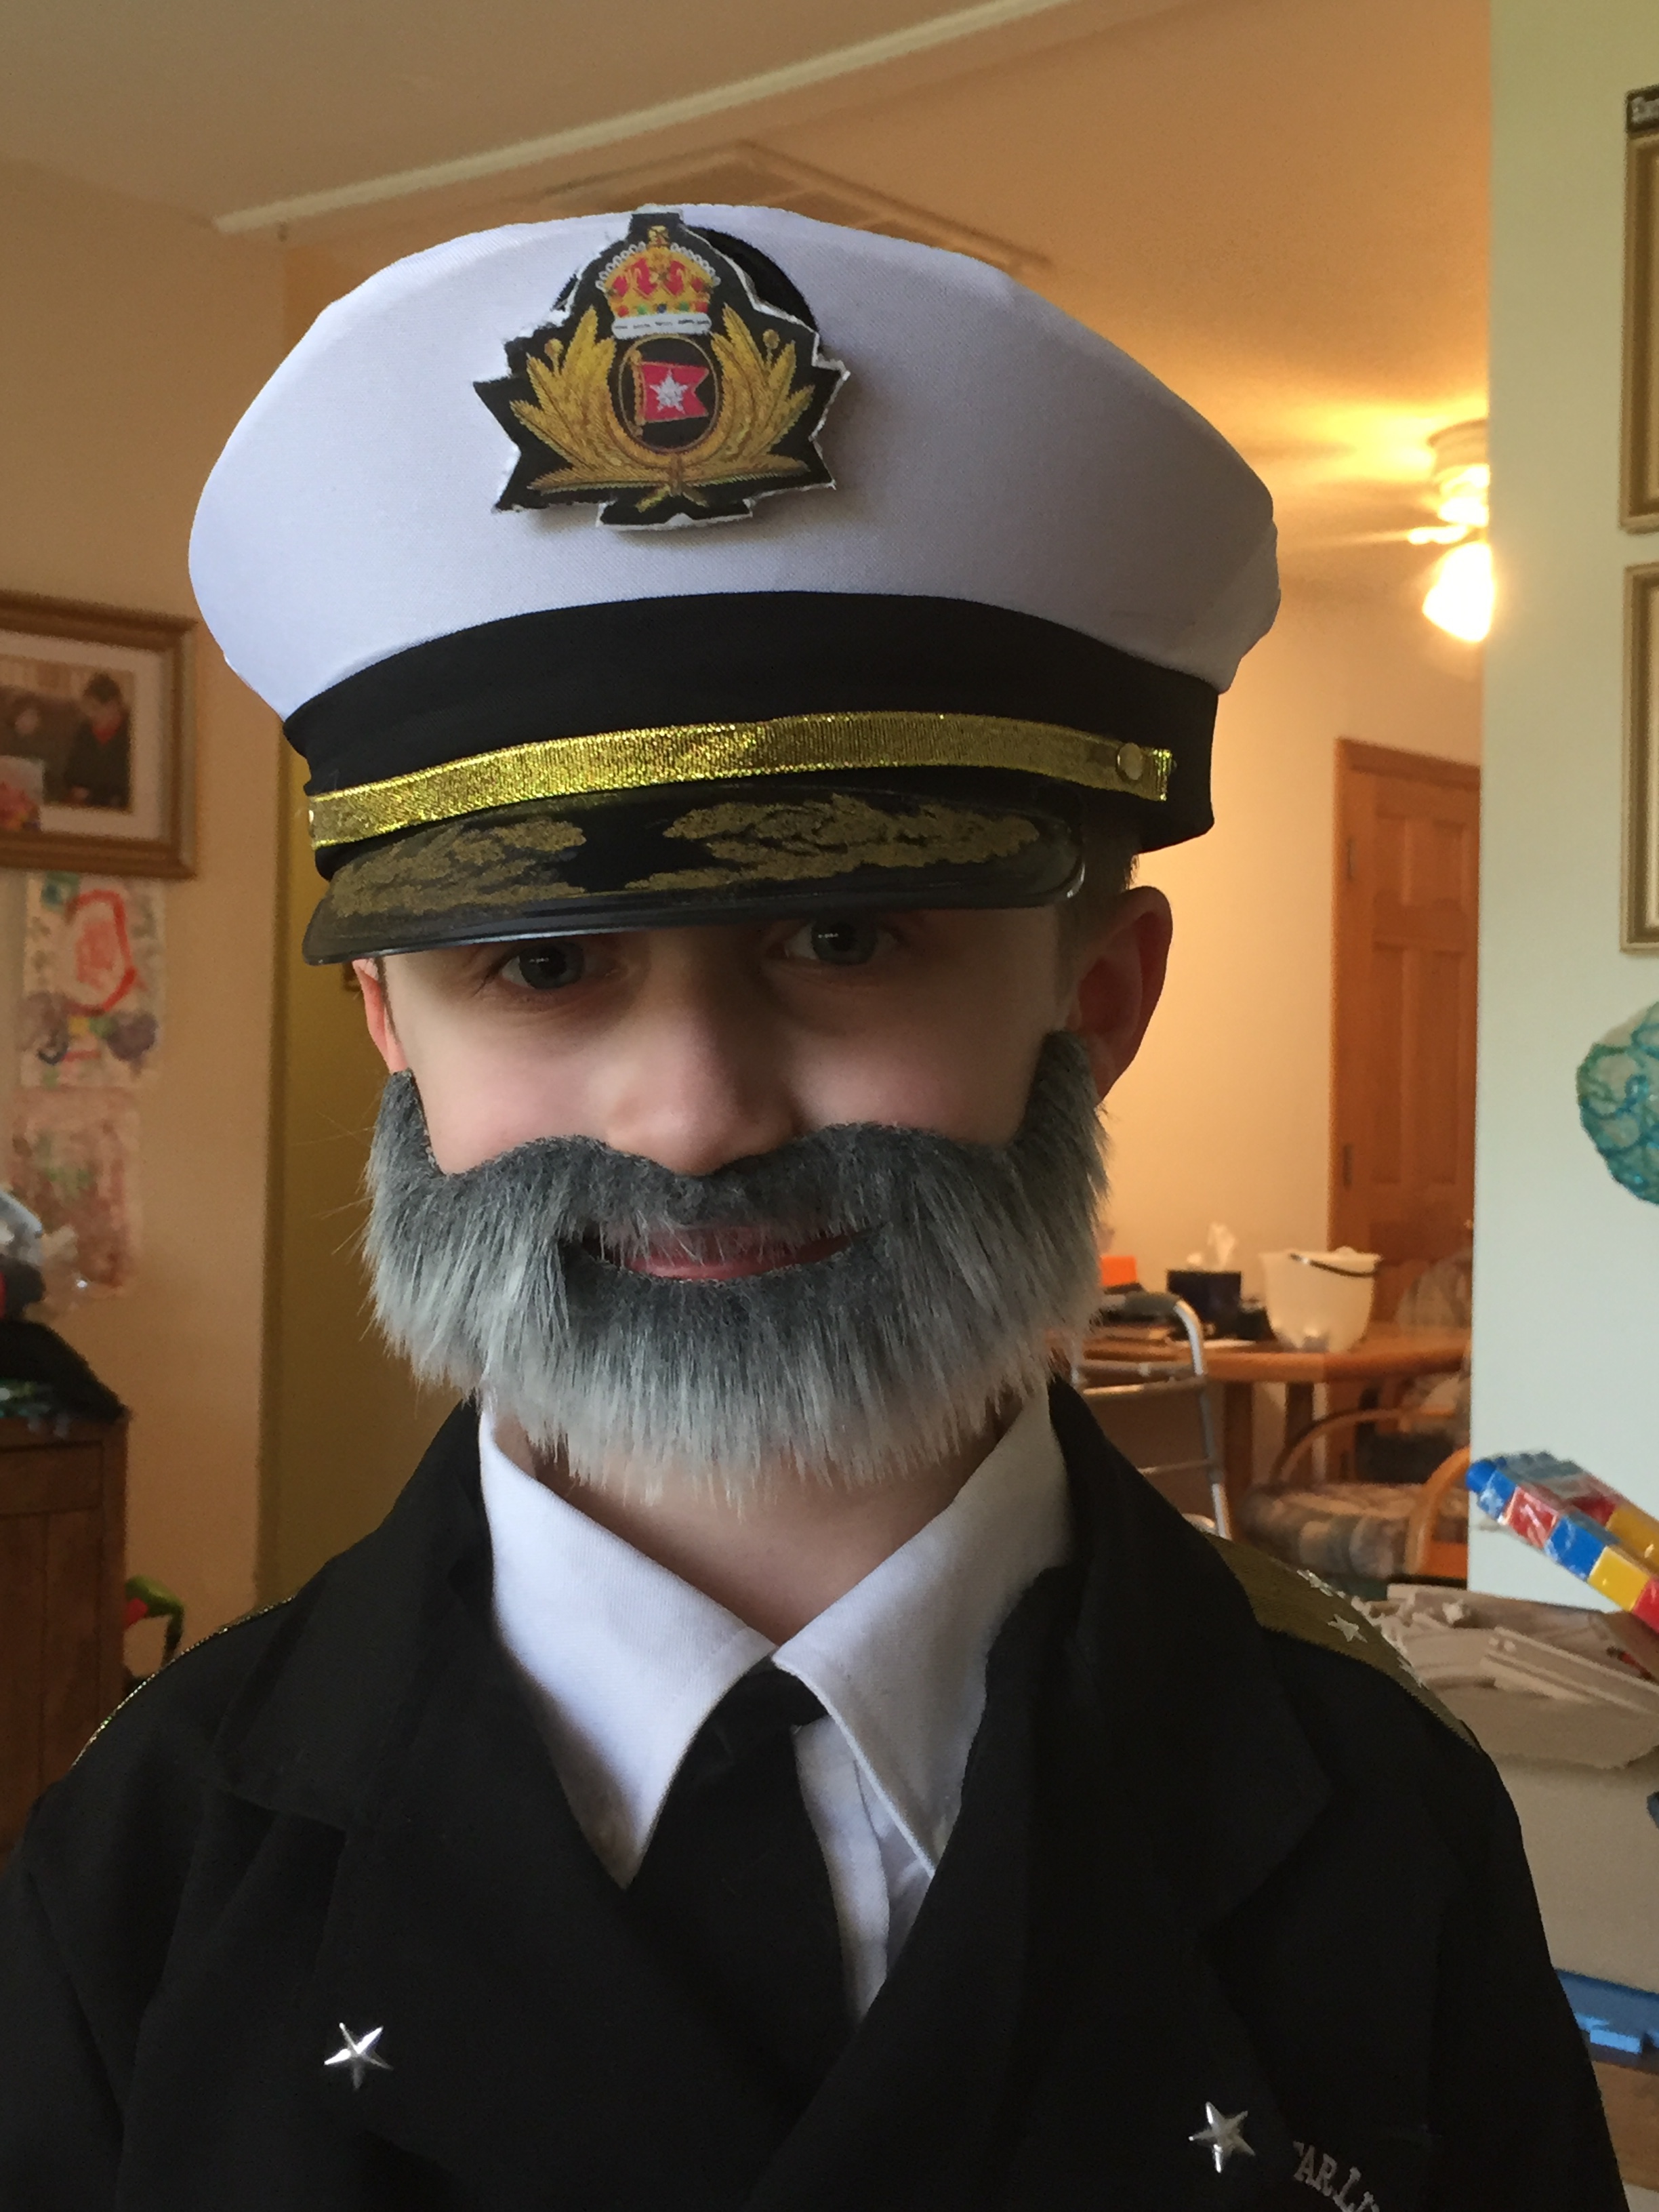 |
| Here is the beard. It looked great, but he only wore it long enough for me to take this picture |
On Halloween, we went to my dad's house prior to school, and while I was in the kitchen, I heard my son wailing "Dziadziu, noooooo!" When I came back into the living room, I saw that my dad had glued cotton balls onto the 4th funnel, because he assumed they had fallen off 🤣. After I picked off the interloping cotton balls, we were off to school.
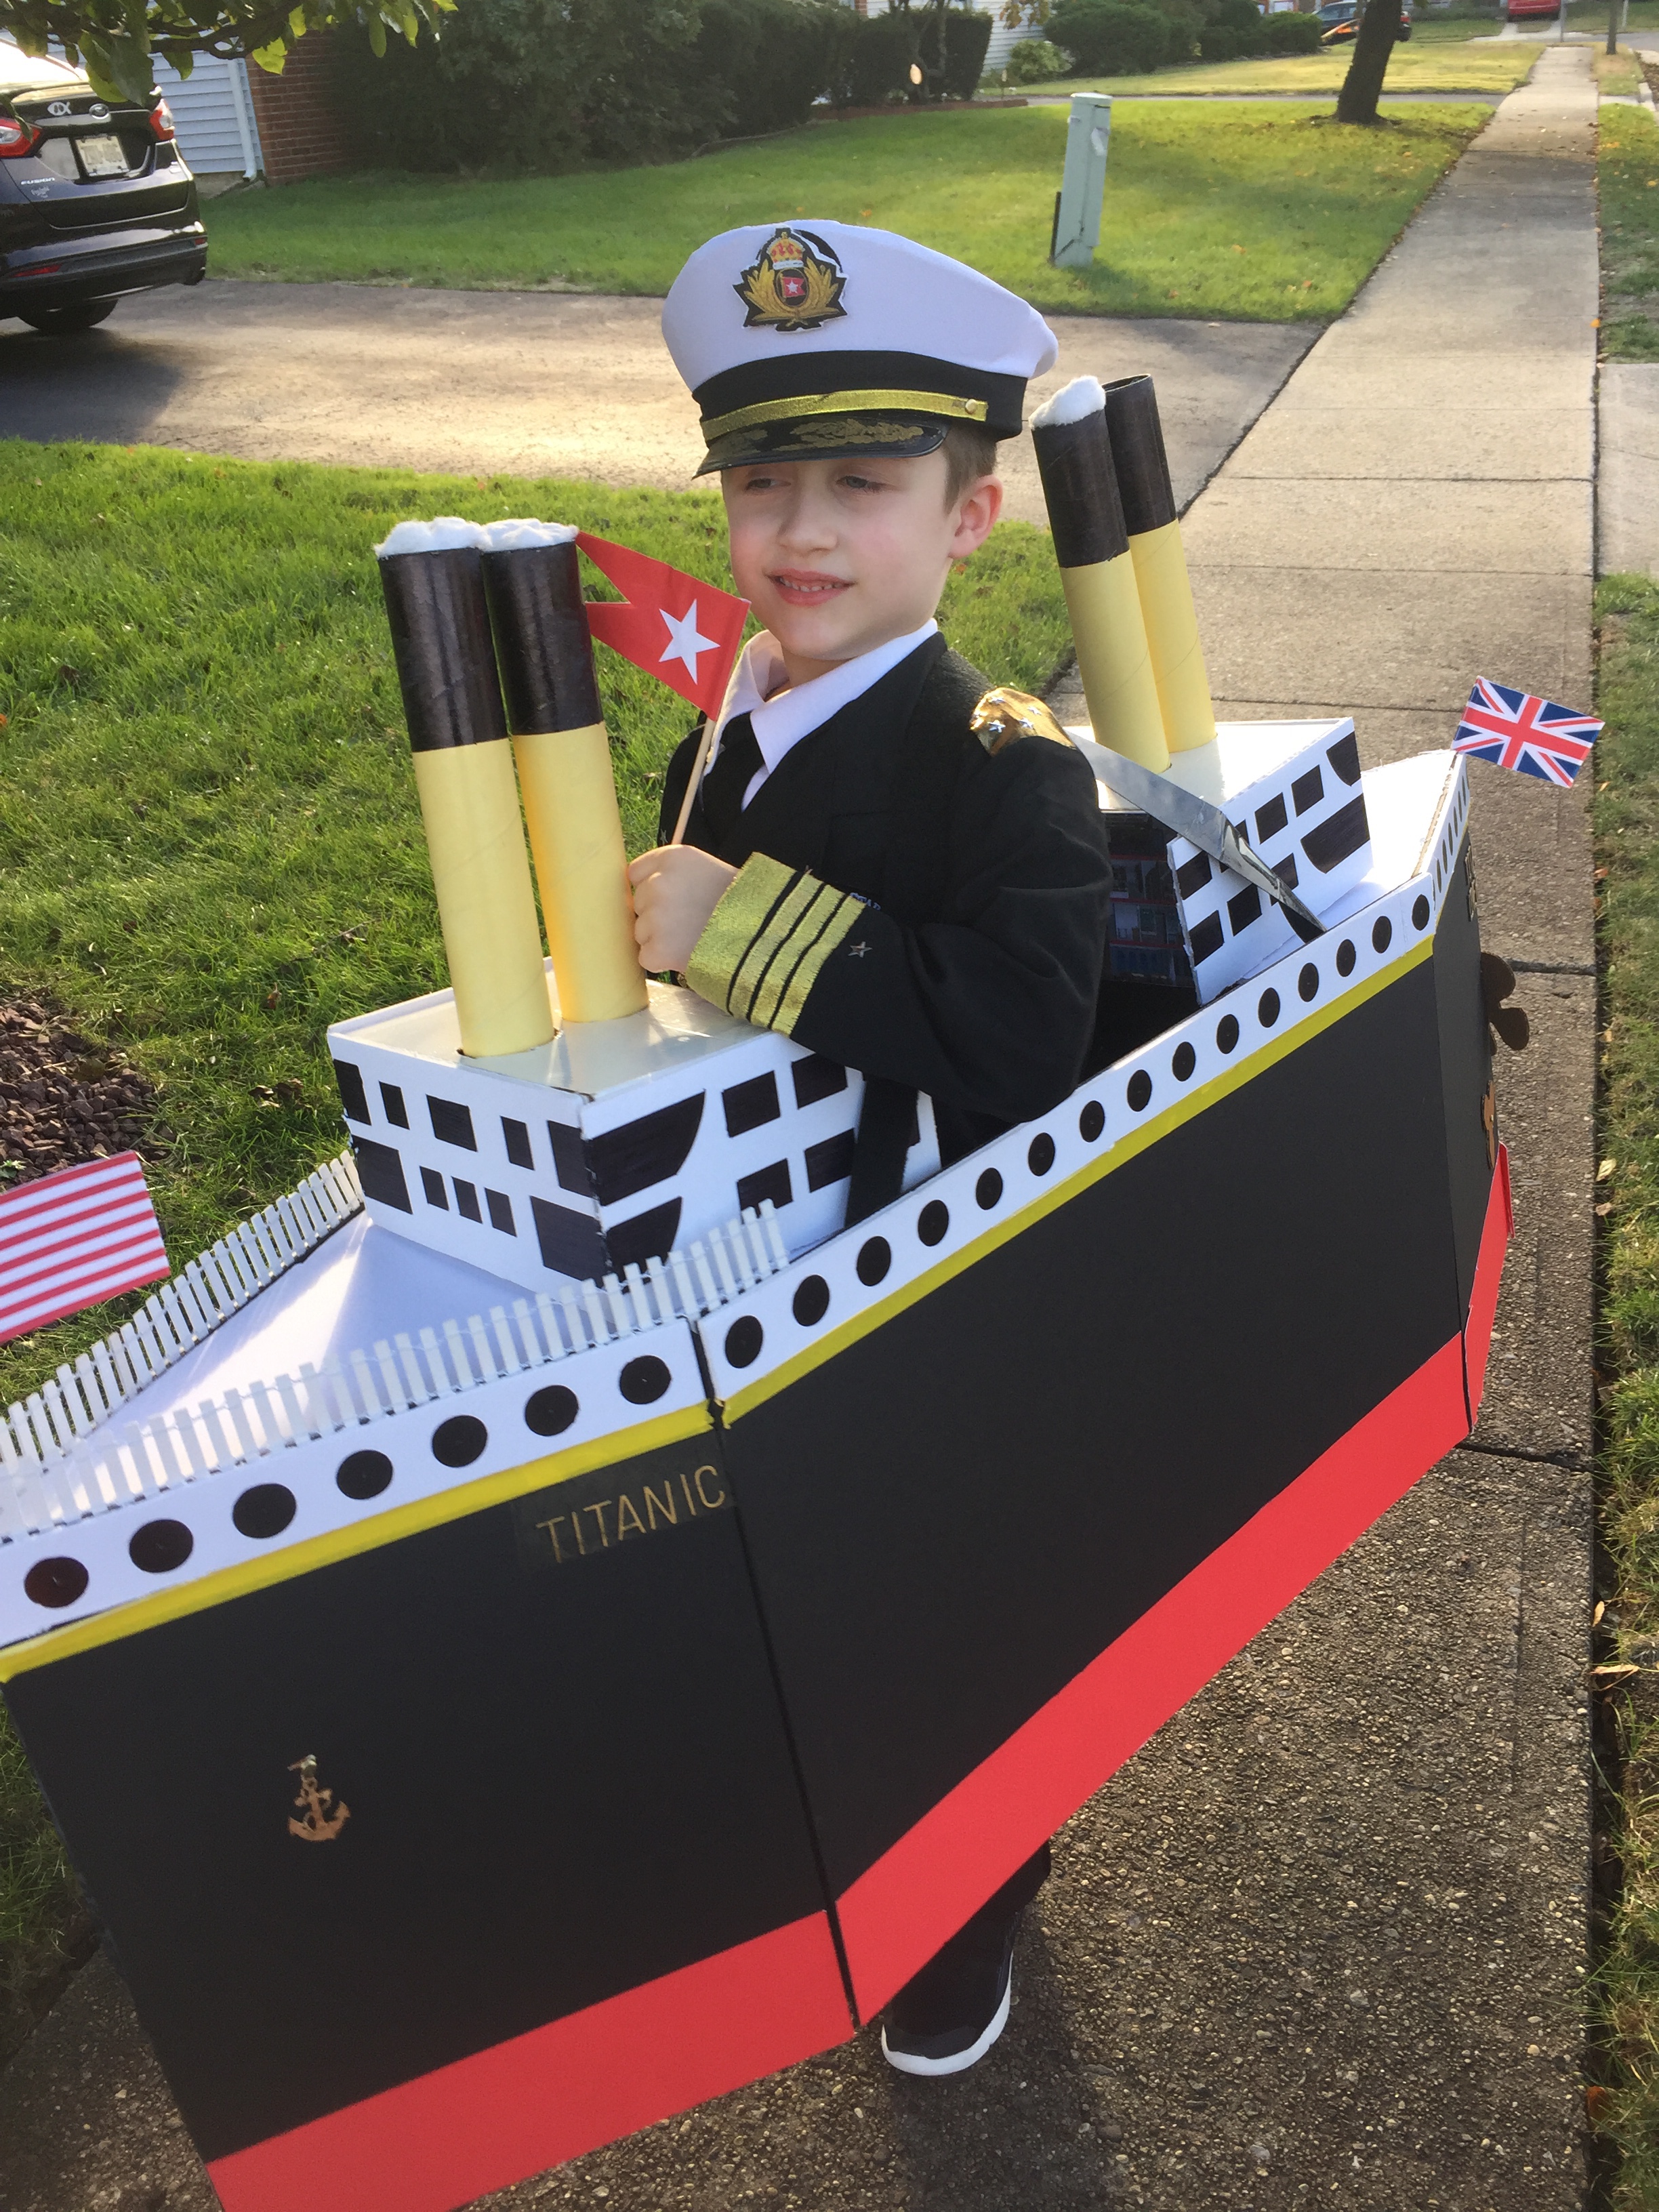
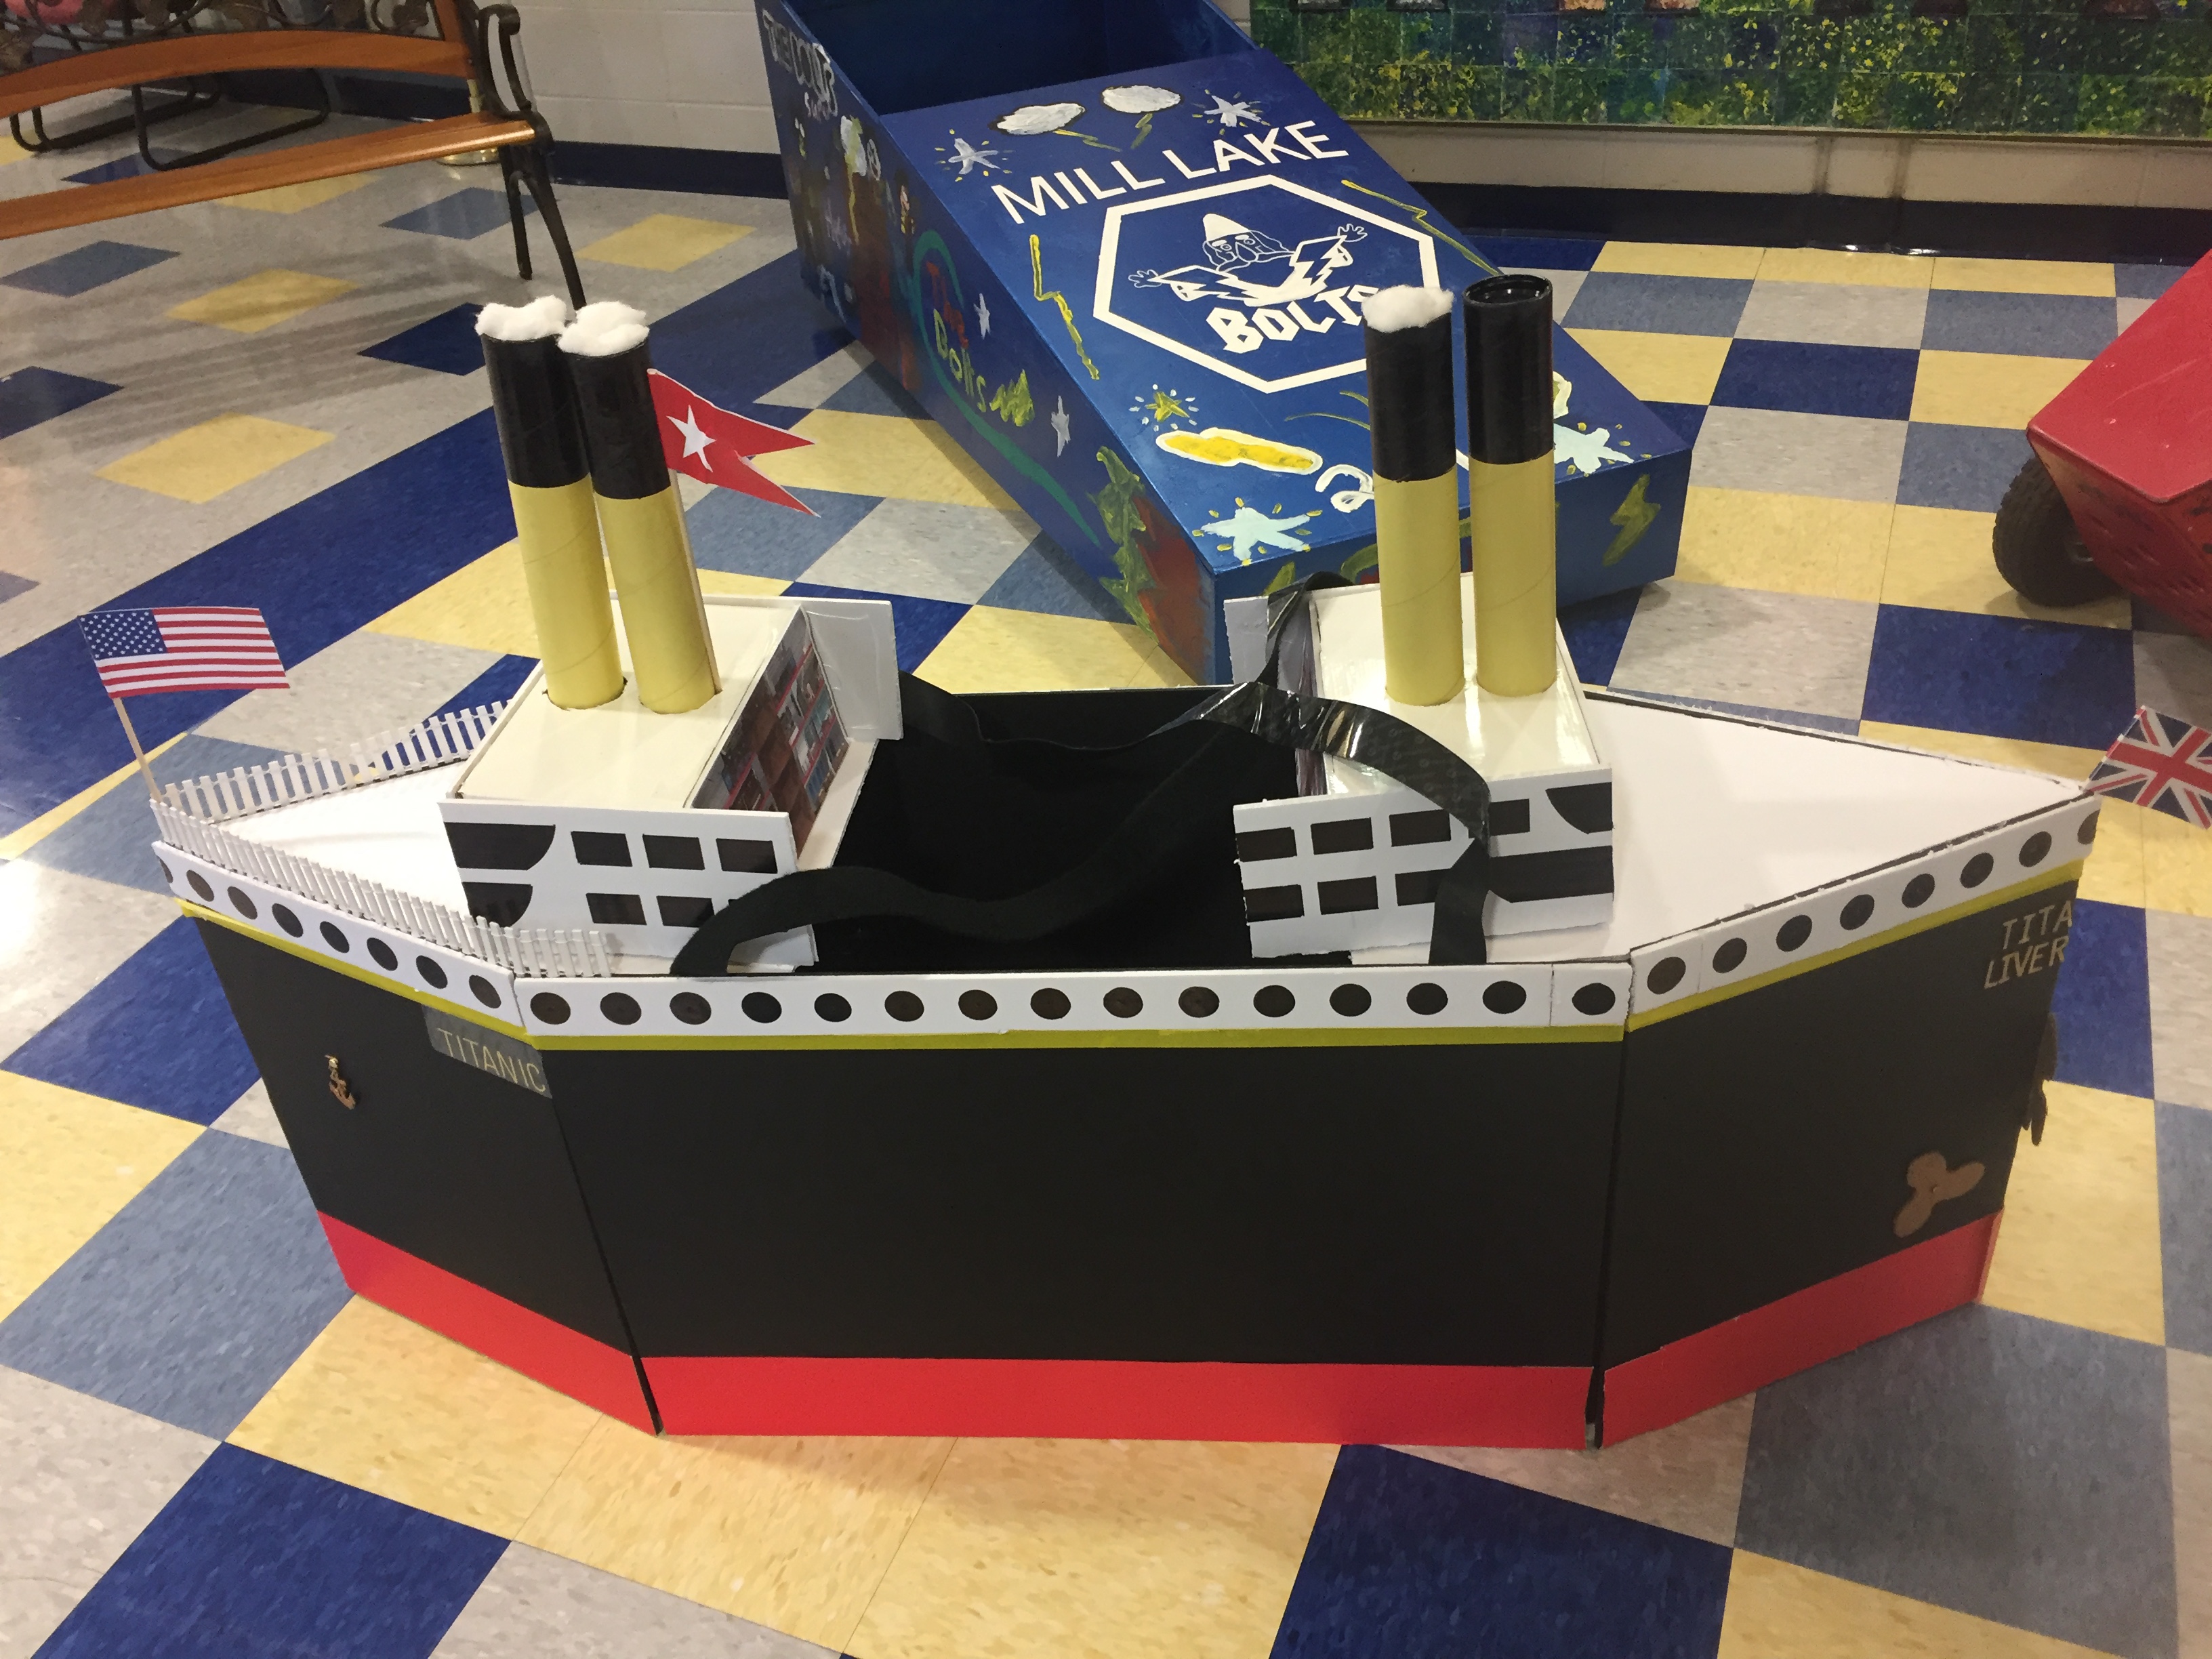
Here is the full length ship, at my son's school, at 5 feet long and 3.5 ft high (with the stacks on):
It just fit into the back of my Honda Pilot diagonally with the 3rd row folded down, and the stacks/funnels off.
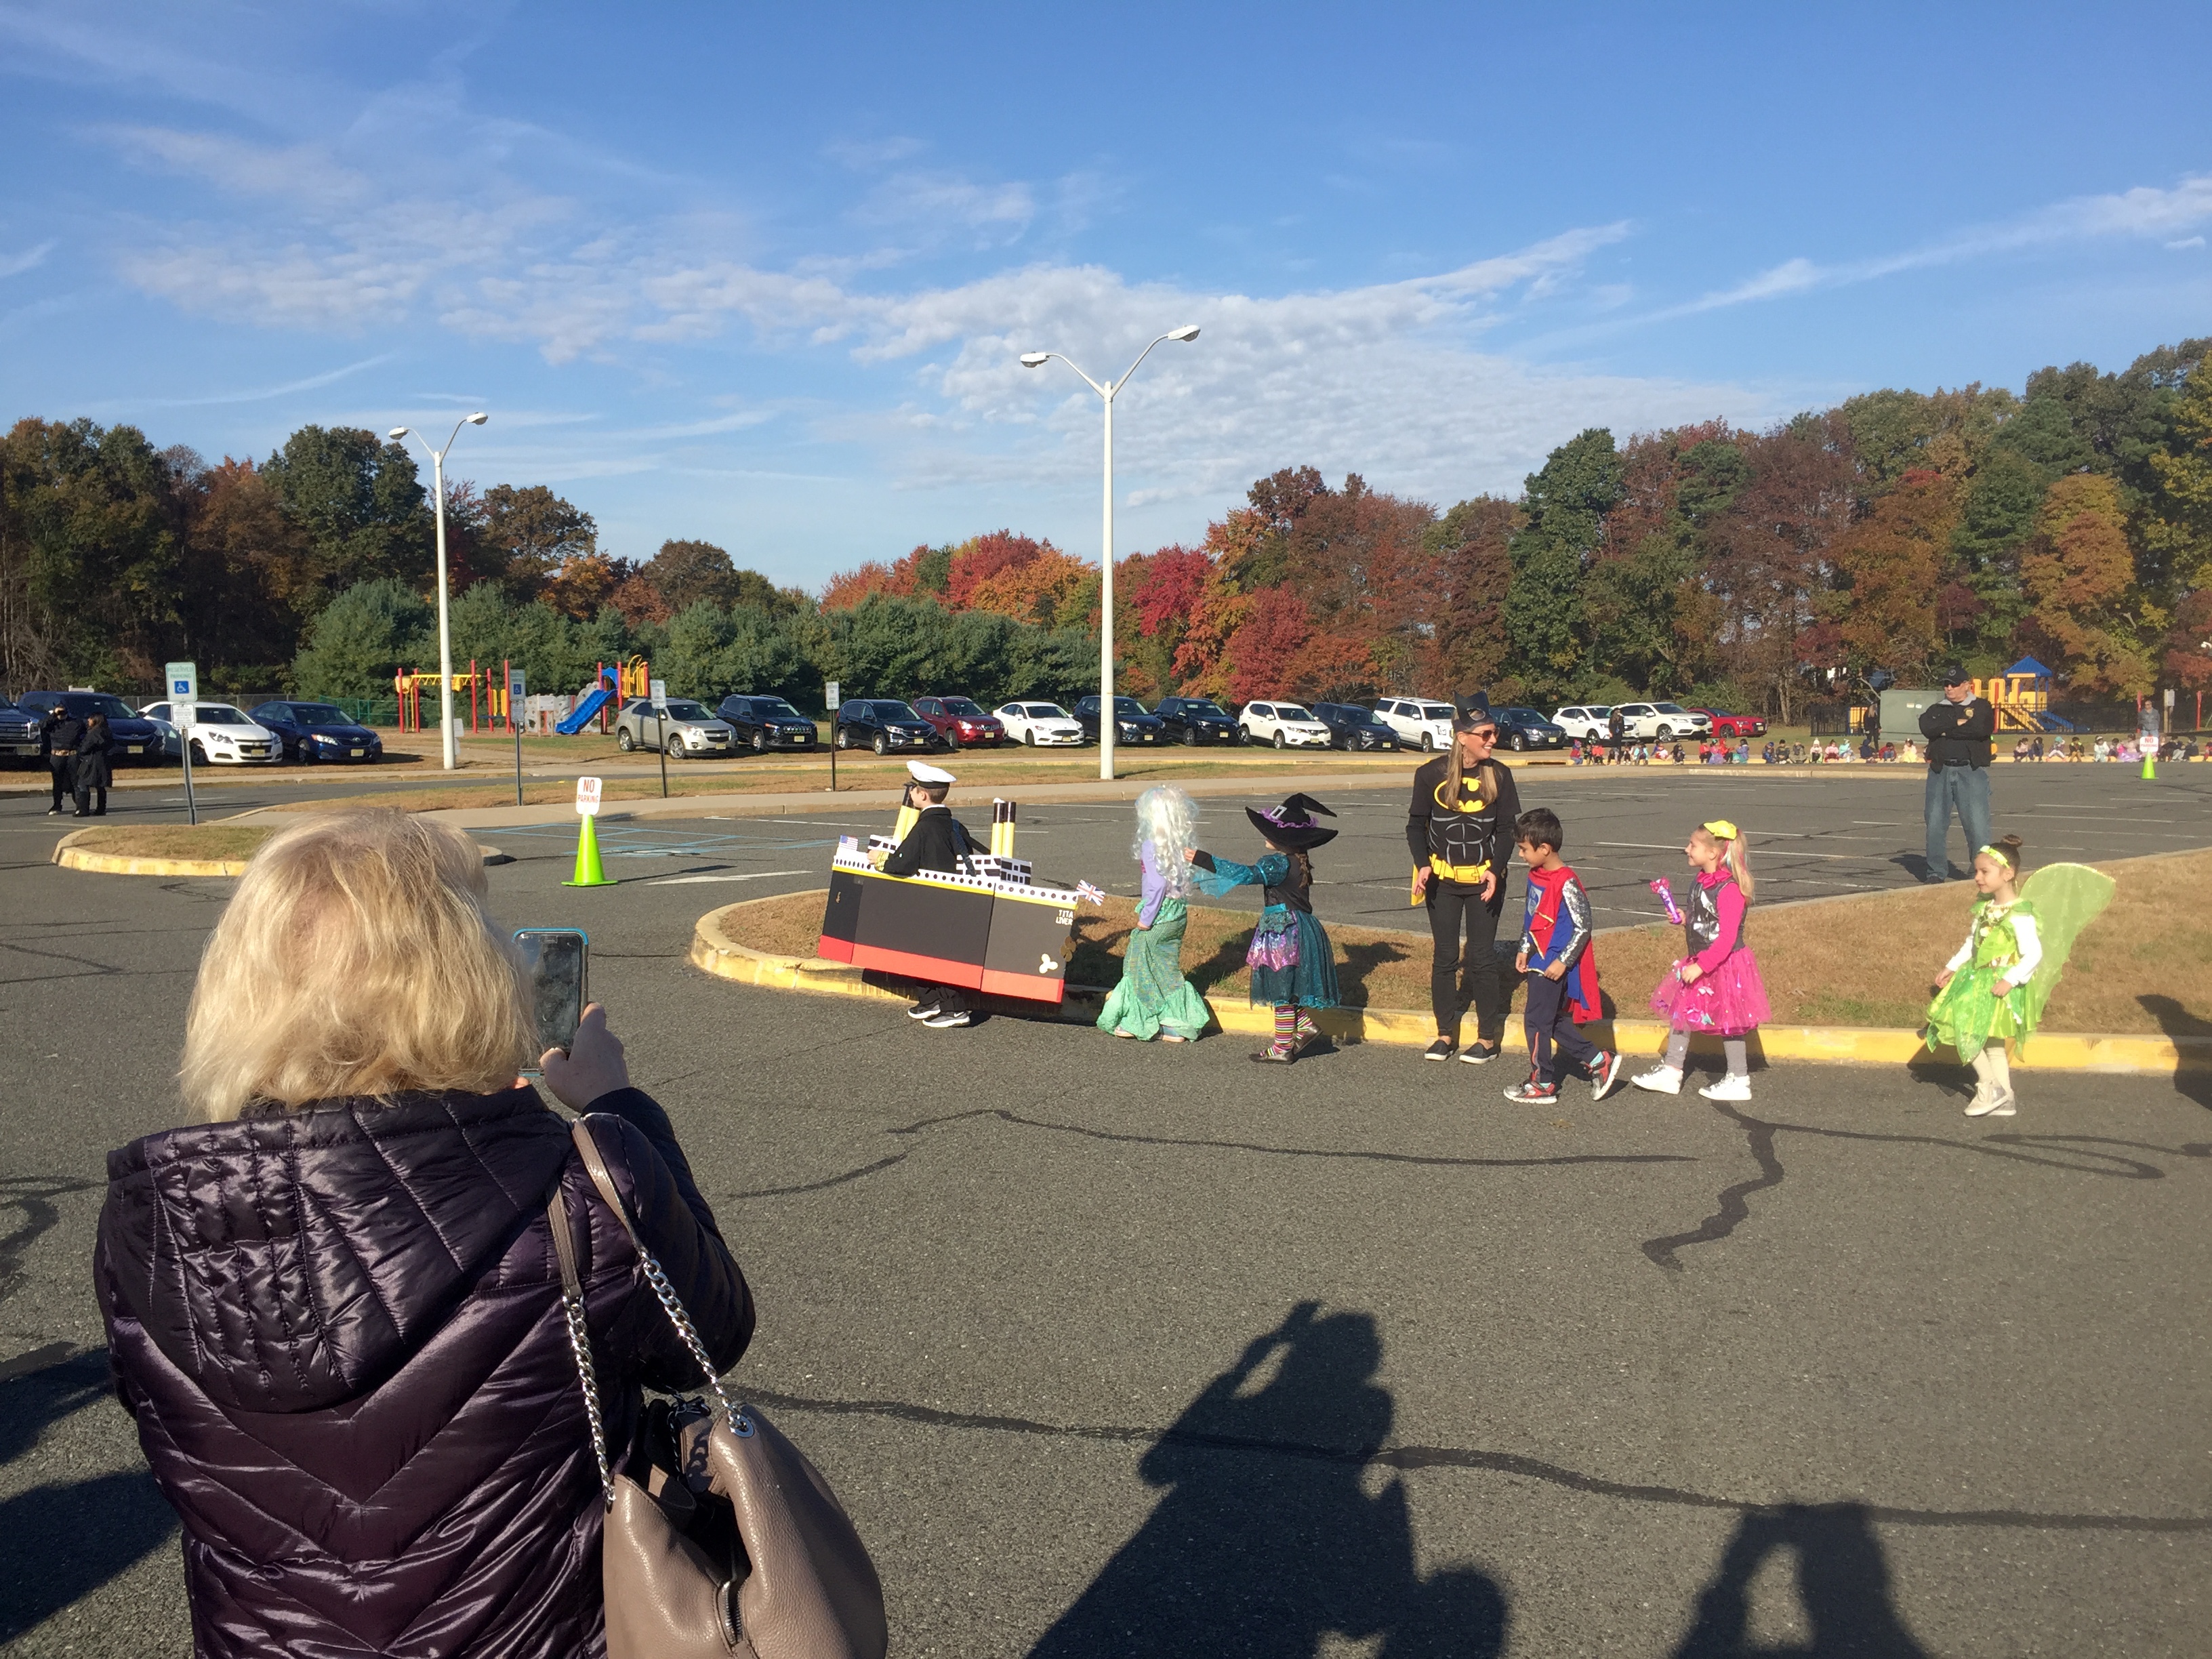
 |
| Parade pic |

 |
| His costume took up So. Much. Space. I didn't intend for it to be so big, it just kind of happened |
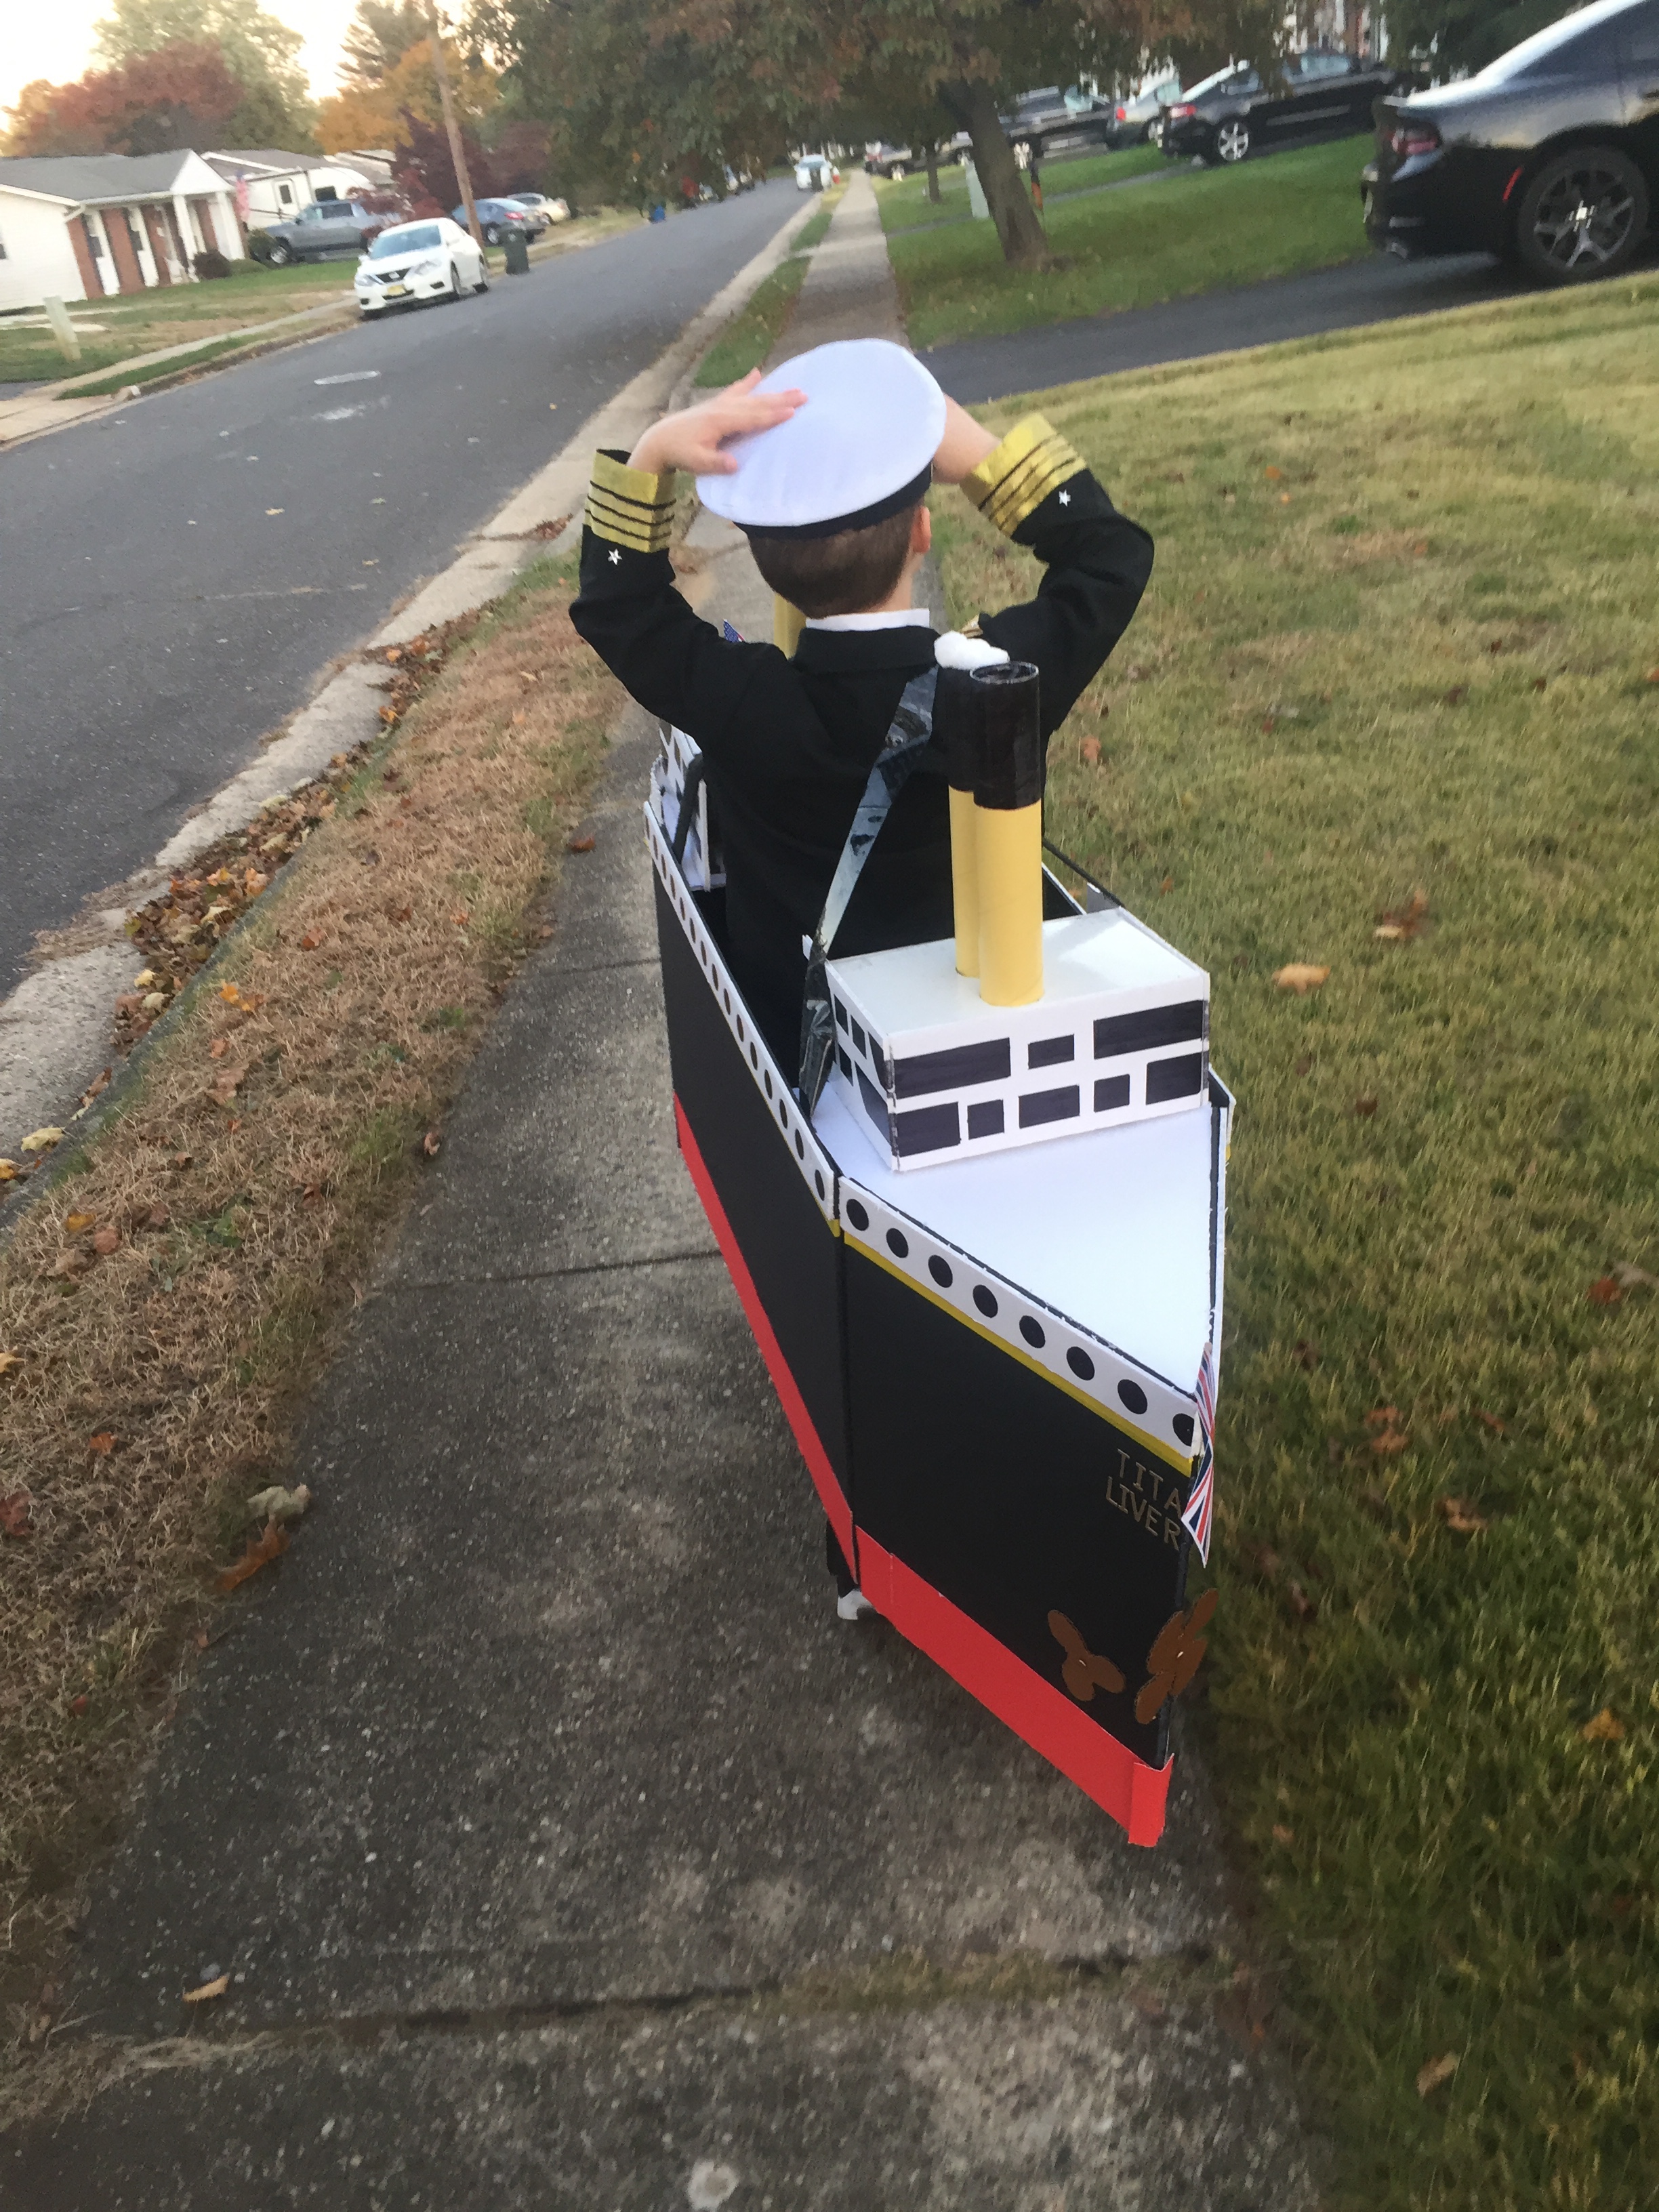
 |
| Trick or Treating |


 |
| The captain |
There are some things I might do differently a second time around, but I have no regrets about taking on this project, as much work as it was. I'm pretty sure my son's memories will last a lifetime, I know mine will.


